Since, as you can see if you are reading this, the world did not end on December 21st, we can see that the end of the latest b'ak'tun in the Mayan calendar did not signal the end of the world any more than the ending of our calendar on December 31st does. The Mayan calculators simply had to pick a cut-off point for their future calendar predictions, and considering they chose one several hundred years past the point where their culture was actually really using it, I'd say they did a pretty good job. Sure, in these days of electronic computers it's trivial to extend the Gregorian calendar forward arbitrarily far in time, but in those days when all calculations were done by hand there comes a point where you just have to call it quits.
Anyway, happy New Year, everyone, I'll see you in 2013!
Monday, December 31, 2012
Thursday, December 27, 2012
Mele Kalikimaka ia kākou!
Merry Christmas everyone! I realized I'd never done a Christmas post before, and now that I've attempted it I remember why: the Internet at my parents' house is notoriously inconsistent when there are the slightest clouds in the sky, leading to an inability even to post for the past few days. Still, I hope that you all had a good Christmas, and a happy New Year.
Thursday, December 20, 2012
One Last Day of Work
Well, here I am, about to head off to my last day of work. Of course the only reason I'm working all day today instead of just tonight as I was originally scheduled is that my co-worker who was supposed to work today got stranded in the Mainland because of a canceled flight and couldn't make it home in time. Thus I'm filling in.
So, yeah. At the end of this week I'll be leaving my current job for my new one at the James Clerk Maxwell Telescope, which starts in January. Big changes are afoot.
So, yeah. At the end of this week I'll be leaving my current job for my new one at the James Clerk Maxwell Telescope, which starts in January. Big changes are afoot.
Tuesday, December 18, 2012
One Ring Nebula to Rule Them All
Today I have something besides another globular cluster picture for your perusal. It's a picture of a nebula fairly famous in astronomical circles that I've seen prob-ably hundreds of times in the telescope (it's a popular target during the summer) but have never actually imaged before.
Perhaps it's appropriate that I have this picture less than a week after The Hobbit came out, as this object, Messier 57, is popularly known as the Ring Nebula. It's a small planetary nebula (small on the sky, not physically) found in the constellation Lyra, the Lyre, best seen during the summer and autumn. When I say small, it's only about 1.5 by 1 arc-minutes in diameter; compare that with Messier 55 from my last post, at 19 arc-minutes across. I've therefore cropped out the central region for easier viewing.
The Ring Nebula is about 2,300 light-years from Earth, and is currently about two and a half light-years across. Measurements of its expansion rate suggest that it has been expanding for about \(1,610\pm240\) years.
The processes forming the Ring Nebula have to do with the life cycles of stars. When stars about the mass of the Sun exhaust the hydrogen in their cores, they go through a complex process of fusing the helium produced by hydrogen fusion into heavier elements, then those into heavier elements, up the periodic table till they get stuck at carbon, having insufficient mass to fuse it to anything higher. During this time, due to other concurrent processes, their atmospheres swell up to become hundreds of times larger than before. As the star runs out of fusible material in its interior it gradually loses its grip on its outer atmosphere which puffs off into space, and which would have been observed starting sometime between A.D. 250 and A.D. 670.
This escaped atmosphere is what we're actually seeing when we look at the Ring Nebula. The core of the progenitor star has contracted down to a small white dwarf of mostly carbon about the size of Earth, but containing about the mass of the Sun. It currently has a temperature of about 125,000 K (~225,000 \(^\circ\)F) and lights up the surrounding atmosphere like a beacon as it blows away. The white dwarf at the center of the Ring Nebula is too faint to be seen in this picture, but is estimated to weigh about 20% more than the Sun currently does.
One of the reasons that I haven't had a picture of this famous (and not un-photo-genic) nebula up before, is because I'd already taken a picture of it...sorta. Sometime during the summer of 2010, I think, I tried imaging it using the narrow-band filters on the imager. Unfortunately, the night I chose had some very thin, high clouds, and I quickly learned that just because a star is bright enough over the entire visible light spectrum to serve as a guide star, does not mean it will be bright enough when you are only looking at the minuscule fraction of its light that comes through a narrow-band filter. Basically, it lost tracking during the exposure, the resulting picture was ruined, and I just never got around to imaging it again, there being plenty of other objects in the summer and autumn sky to keep me busy. This September I finally got around to imaging it and I'm glad I did, for completeness' sake if nothing else.
Perhaps it's appropriate that I have this picture less than a week after The Hobbit came out, as this object, Messier 57, is popularly known as the Ring Nebula. It's a small planetary nebula (small on the sky, not physically) found in the constellation Lyra, the Lyre, best seen during the summer and autumn. When I say small, it's only about 1.5 by 1 arc-minutes in diameter; compare that with Messier 55 from my last post, at 19 arc-minutes across. I've therefore cropped out the central region for easier viewing.
 |
| Messier 57, the Ring Nebula, in Lyra, at 100% resolution from the camera. |
The processes forming the Ring Nebula have to do with the life cycles of stars. When stars about the mass of the Sun exhaust the hydrogen in their cores, they go through a complex process of fusing the helium produced by hydrogen fusion into heavier elements, then those into heavier elements, up the periodic table till they get stuck at carbon, having insufficient mass to fuse it to anything higher. During this time, due to other concurrent processes, their atmospheres swell up to become hundreds of times larger than before. As the star runs out of fusible material in its interior it gradually loses its grip on its outer atmosphere which puffs off into space, and which would have been observed starting sometime between A.D. 250 and A.D. 670.
This escaped atmosphere is what we're actually seeing when we look at the Ring Nebula. The core of the progenitor star has contracted down to a small white dwarf of mostly carbon about the size of Earth, but containing about the mass of the Sun. It currently has a temperature of about 125,000 K (~225,000 \(^\circ\)F) and lights up the surrounding atmosphere like a beacon as it blows away. The white dwarf at the center of the Ring Nebula is too faint to be seen in this picture, but is estimated to weigh about 20% more than the Sun currently does.
One of the reasons that I haven't had a picture of this famous (and not un-photo-genic) nebula up before, is because I'd already taken a picture of it...sorta. Sometime during the summer of 2010, I think, I tried imaging it using the narrow-band filters on the imager. Unfortunately, the night I chose had some very thin, high clouds, and I quickly learned that just because a star is bright enough over the entire visible light spectrum to serve as a guide star, does not mean it will be bright enough when you are only looking at the minuscule fraction of its light that comes through a narrow-band filter. Basically, it lost tracking during the exposure, the resulting picture was ruined, and I just never got around to imaging it again, there being plenty of other objects in the summer and autumn sky to keep me busy. This September I finally got around to imaging it and I'm glad I did, for completeness' sake if nothing else.
Tuesday, December 11, 2012
Globular Cluster Photo Series (Part 28): M55
Today I have another globular cluster picture for you, and this one just happens to be the next in the Messier catalog: Messier 55, in Sagittarius. This globular cluster is much closer than M54, at a moderately distant 17,600 light-years. It appears almost twice as large on the sky at 19.0 arc-minutes, but is a mere third its actual size at 96 light-years in diameter. It's also a lot less compact than M54 (class XI out of XII), and really looks quite nice.
Not every object in Charles Messier's catalog was discovered by him (and he gave credit where it was due), and M54 is one such object. It was discovered by an astronomer named Nicholas Louis de Lacaille from an observatory in South Africa in 1752. Messier, having heard of this discovery, tried several times to locate the cluster starting in 1764, but was stymied by its low apparent height from his location in Paris (it is located 30 degrees south of the celestial equator, which makes it rather difficult to see from mid-northerly latitudes). In fact, it wasn't until 1778 – 14 years later – that Messier was actually able to find it, after which he included it in his famous catalog of objects.
All in all, M55 is a rather nice looking cluster, if I say so myself.
 |
| Messier 55 in Sagittarius. |
All in all, M55 is a rather nice looking cluster, if I say so myself.
Saturday, December 8, 2012
Globular Cluster Photo Series (Part 27): M54
It's been a while since I had any astronomical images to show, hasn't it? I haven't been able to use the imager for a while now, due to a combination of poor weather and being busy, but I do have a few images from September lying around that I never got around to reducing. Today I have the first of those, a picture of the globular cluster Messier 54 in Sagittarius.
Messier 54 is an interesting globular in several ways. For starters, it doesn't actually belong to our galaxy – or at least is a relatively recent acquisition. It appears to originate from the Sagittarius Dwarf Elliptical Galaxy (or SagDEG), a small nearby satellite galaxy of the Milky Way currently residing opposite the galactic core from us. SagDEG has four known globular clusters of its own, of which Messier 54 is the largest and main one.
Because it's on the other side of the core, M54 is the most distant cluster I've yet photographed, at a whopping 87,400 light-years away, easily surpassing the next most distance cluster I've shown here (M53, 58,000 light-years). For comparison, the Milky Way Galaxy itself is only about 100,000 light-years across. Despite its great distance, M54 still appears a relatively large 12.0 arc-minutes across on the sky, fully one-third the diameter of the full Moon. At its distance, that translates into the incredible diameter of about 306 light-years, making M54 larger than nearly every other globular cluster in the Milky Way (and certainly all the ones I've shown so far). It is also very luminous, shining with the light of 850,000 Suns, being outshone only by the brilliant cluster Omega Centauri (which is also a lot closer).

M54 is also one of the denser globular cluster, being a class III on the density scale (with class I being the densest and XII the least dense). It's also possible, according to a 2009 paper, that there may be a black hole with a mass 10,000 times that of the Sun at the center of the cluster, which is unusual for a globular cluster. All in all, it's a fascinating cluster.
Saturday, December 1, 2012
A New Room
Falling squarely in the category of "not particularly important, and only mildly life-altering", I've decided to move from my current room on the ground floor in the house where I live up to the empty room on the second floor.
This is exciting for me, as I don't think I've ever had a room above the ground floor (given the number of houses I've lived in across my lifespan, I actually had to pause to give that thought). Being on the second floor for this house means it'll be a bit warmer in general (good in the winter, not so nice in the summer), and also that I shouldn't have to worry about encountering centipedes anymore. The experience of "moving" has also pushed me to do some cleaning and tossing of stuff I no longer need. I don't think of myself as someone who spends much money on material items, so it's been a bit of a shock to see just how much stuff I've nevertheless managed to accumulate in my three years here.
I just started moving stuff upstairs today, but I'm hoping to be done or almost done by tomorrow night and actually be sleeping up there. Need to get some sleep now, as moving heavy stuff upstairs turned out to be more tiring than I expected. A hui hou!
Friday, November 30, 2012
A New Job
In the category of "fairly important and relatively life-altering events", as of two days ago I have accepted a position as a Data Quality Assistant at the James Clerk Maxwell Telescope, starting early next year. As this is a full-time position, I'll be leaving my job at the Mauna Kea Visitor Information Station in three weeks' time.
Having written that, I'm having trouble thinking of anything else to add to it. I've learned a lot while working at my current job, and will definitely miss my coworkers when I leave (though I intend to resume volunteering, just as I did before I was hired there). I'm also very excited (and a bit trepidatious) to be working in a job that, I feel, fits well with my problem-solving and computer abilities. And working for one of the best astronomical observatories in the world is both stimulating and intimidating! However things go, there will certainly be some changes for me in the coming weeks. A hui hou!
Having written that, I'm having trouble thinking of anything else to add to it. I've learned a lot while working at my current job, and will definitely miss my coworkers when I leave (though I intend to resume volunteering, just as I did before I was hired there). I'm also very excited (and a bit trepidatious) to be working in a job that, I feel, fits well with my problem-solving and computer abilities. And working for one of the best astronomical observatories in the world is both stimulating and intimidating! However things go, there will certainly be some changes for me in the coming weeks. A hui hou!
Tuesday, November 27, 2012
Relativistic Gaming Fun
How many games can you name off the top of your head that involve simulating the effects of relativity? Before Sunday I'd have had a hard time naming even one, but since then I've discovered not just one, but two.
The first one is a simple Flash game called Velocity Raptor, a game that takes place in two dimensions of space and one of time, right from the comfort of your own web browser! It features a whimsical art style and story suitable for all ages, and calming, ambient music. This game simulates the effects of special relativity by slowing the speed of light down to 3 miles per hour. Naturally, this changes things in ways that we are not normally equipped to think about, and the game is mind-bending while still managing to be fun. It builds up, introducing you first to a Newtonian world, then the world of relativity as measured (without taking into account light travel time), then finally the world as seen, where light takes a noticeable amount of time to reach you and things begin to appear to deform in wild and amazing ways. I found myself smiling quite a bit while playing this game as I watched the world around my character (the eponymous Velocity Raptor) warping and stretching . The progression is done well, introducing new concepts (such as the Doppler shift, or the relativity of simultaneity) in simple cases before tasking you with using your new-found knowledge to solve a puzzle to advance. (It actually reminds me a bit of Portal and Portal 2's approach to teaching new concepts, and I think that's a great thing. More games should be like that.) Be warned, the last levels are very difficult.
The second game I came across is called A Slower Speed of Light, produced by the MIT Game Lab (no, I didn't know MIT had a game lab before either). This game is an actual stand-alone program that you have to download (it's free) and run on your computer. Unlike Velocity Raptor, it's a full three-dimensional (well, four-dimensional, since it involves relativity) first-person view game. Similar to Velocity Raptor, it involves slowing down the speed of light rather than you moving close to the measured speed of light. However, it goes about it differently: in the game, your goal is collect 100 orbs, each of which, when collected, slows down the speed of light by a little bit. This has the effect of starting you in a basically Newtonian world that gradually gets more and more relativistic as you collect more orbs. The final ones can prove challenging to collect, not because of any obstacles, but because it can be difficult to judge position accurately when turning at near light-speed. The simulation mostly involves the Doppler shift and the Searchlight Effect, but upon collecting all 100 orbs those effects are turned off and speed of light is dropped to just above your walking speed, allowing you to see the Lorentz transformations that take place at significant fractions of light-speed. It's a lot easier than Velocity Raptor in that there is no way to actually lose, and watching spacetime warp and deform around you in first-person view is incredibly cool. The game authors are working on cementing the underlying game engine and planning to release it sometime next year as open-source software, so hopefully we'll start seeing more games that are truly relativistic.
I can definitely recommend these games to any aspiring physicists out there. It's incredibly cool to see these relativistic concepts come alive. But even if you're not a physicist, you can play them and experience some of the fun we get to have discovering these ideas!
Thursday, November 22, 2012
Hauʻoli Lā Hoʻomaikaʻi!
Happy Thanksgiving everyone!
Once again it's that time of year where I am reminded how thankful I am to have loving family and friends, a steady job (even if I did have to work this evening), and a good living situation.
Speaking of working, I was able to see what kind of Thanksgiving dinner the cooks made up at Hale Pōhaku:

I will note that this is actually not my plate, but that of a friend of mine. I only thought to take a picture of our Thanksgiving dinner after I saw him doing so, and since I'd already cleared half my plate I asked to use his. Also, I hadn't noticed the cranberry sauce on the salad bar. That minor detail was easily fixed, and all in all I had a pretty good Thanksgiving dinner. The weather was completely overcast the entire evening as well, so it was nice and quiet at the VIS, for which I was thankful. Hope your Thanksgiving was as pleasant as mine!
Tuesday, November 20, 2012
The Internal Energy of Air
You know how sometimes, as you're going about your daily life, a completely random thought leads to you suddenly being intensely curious about something and unable to rest until your curiosity has been sated? This weekend I was thinking about nothing in particular while setting up for the morning at work, when I got the burning desire to know how much internal energy a cubic meter of air contained.
The nice part of being a physicist is that I can satisfy these urges, and the nice part of having a blog is that I can share it with other people! So without further ado, let's attempt to calculate the internal energy of 1 cubic meter of air at standard atmospheric pressure and room temperature (around 80 °F, or specifically for ease of calcuation, 300 kelvin).
This is actually fairly simple in theory. There exists a simple equation in thermodynamics for the internal energy of an ideal gas: \begin{equation}U=\frac{N}{2}nRT\tag{1}\end{equation} In this equation, U is the internal energy locked up in each of the N degrees of freedom of the gas, n is the number of moles of gas, the constant R is the ideal gas constant with value \(8.3144621\ \text{J}/(\text{mol}\cdot\text{K})\), and T is the absolute temperature in kelvins.
Now, at this point I should probably elaborate on what internal energy is and what it has to do with degrees of freedom. As I'm sure you know, the temperature of a system is merely a measure of the average energy of its constituent particles. This energy is called the internal energy of the system and can be stored in several different ways, each of which is known as a degree of freedom: in the motions of particles (atoms or molecules), in the rotation or vibration of molecules, or in the excitation and relaxation of electrons in the atoms (not all of these actually apply to all systems, as we shall see).
In thermodynamics there is a theorem known as the equipartition theorem that states that the available internal energy of a system is equally divided among all of its degrees of freedom. If we look at an ideal monatomic gas (such as any of the noble gases), it has only three degrees of freedom, corresponding to the three ways the particles making up the gas can move in three dimensions. Technically, the energy stored by electrons being excited in the atoms could count as another degree of freedom, but at the relatively low temperatures we're considering for this problem there is very little excitation going on and we are free to ignore this effect.
This would be fine if we were considering a monatomic gas, but we are interested in air, which is primarily composed of two diatomic gases: nitrogen (78%) and oxygen (21%). (The monatomic gas argon makes up about 90% of the remaining ~1% of the atmosphere, so we will simply assume that it is all argon for simplicity.) Diatomic molecules bring a new factor into the equation, as they can rotate in two dimensions around their long axis, and since energy can be stored in their rotational motion, this gives them another two degrees of freedom. Diatomic molecules can also store energy in the bond between them, and while this could count as another degree of freedom, in practice it takes temperatures much higher than we are considering here for this to be a significant effect.
So, in summary, monatomic gases have 3 degrees of freedom, representing the kinetic energy associated with their motion through three-dimensional space; diatomic gases – at the temperatures we are interested in – have 5 degrees of freedom since they have the ability to rotate as well. (If I was looking at much higher temperatures I'd have to take into account that vibrational mode I neglect here.)
The upshot of that lengthy diversion is that equation (\(1\)) above looks like \(\frac{3}{2}nRT\) for monatomic gases and \(\frac{5}{2}nRT\) for diatomic ones. Since R is a constant and we have a temperature in mind already, all that remains is to find n, the amount of each type of gas.
The n in that equation refers to moles of gas. The mole (abbreviated mol) is a unit used in chemistry and physics to represent a quantity of substance in terms of the number of particles (atoms or molecules) that make it up. A closely related concept is that of Avogadro's Number, \(6.022\times10^{23}\) (named after the Italian scientist Amadeo Avogadro). One mole of a substance is simply the amount of that substance that contains Avogadro's number of particles in it (it's slightly more complicated than that, but this will suffice for our purposes). Avogadro's number may seem arbitrary, but it is actually measured and defined such that if you have an amount of a substance in grams equal to its mean atomic mass in daltons, then you have one mole of that substance. (The name dalton is given to the unit of mass formerly known as the atomic mass unit, a handy measure for measuring the weight of atoms. It is roughly equivalent to the mass of a nucleon.)
For example: a hydrogen atom has a mean atomic mass of \(1.01\) daltons. Hydrogen typically combines with itself to form dihydrogen gas, H\(_2\). Thus dihydrogen gas has a mean molecular mass of \(2.02\) daltons. If you have \(2.02\) grams of dihydrogen gas, you then have one mole (\(6.022\times10^{23}\)) of dihydrogen gas molecules. Oxygen (mean atomic mass \(16.00\) daltons) likewise combines to form dioxygen (O\(_2\)) with a mean atomic mass of \(32.00\) daltons. If you have \(32.00\) grams of dioxygen gas, you then have one mole of dioxygen molecules. Combining the two to make water, H\(_2\)O, gives water a mean atomic mass of \(18.02\) (\(2\times1.01+16.00\)), so if you have \(18.02\) grams of water, you have one mole of water molecules.
Anyway, this lengthy preface should hopefully enable you to follow what should be a fairly straight-forward calculation, which we are finally ready to begin.
First off, we need to find the number of moles of oxygen, nitrogen, and argon in one cubic meter of our theoretical approximation of air. We can do that by first finding the density of air at our specified conditions (300 K, ~80 °F and 1 standard atmosphere of pressure, 101.325 kPa), then multiplying by the fractions established before to find out how much mass of each gas exists, before converting that mass into moles of each gas to fit the equation.
There is a equation for the density of dry air (which we are assuming it is) given by \[\rho=\frac{P}{R_{\text{specific}}T}\] In this equation, \(\rho\) (the Greek letter rho) stands for density (in kg/m\(^3\)), P stands for pressure, R\(_{\text{specific}}\) is a version of the ideal gas constant specifically for dry air equal to 287.058 J/(kg\(\cdot\)K), and T is again the temperature in kelvins.
Putting in the numbers and doing the math, we get:
\begin{align}\rho&=\frac{101,325 \frac{\text{N}}{\text{m}^2} }{287.058 \frac{\text{N}\cdot\text{m}}{\text{kg}\cdot\text{K}} \cdot300.00\ \text{K}}\\
&=1.1766\frac{\text{kg}}{\text{m}^3}
\end{align}
Since we are assuming a single cubic meter of air, our mass of air consists of 1.1766 kg (about 2.6 pounds of air). Multiplying by the fractions we assumed for each of the ingredients, we get:
\begin{align}
m_{\text{N}_2}&=0.78\cdot1.1766\ \text{kg}=0.9177\ \text{kg}=917.7\ \text{g}\\
m_{\text{O}_2}&=0.21\cdot1.1766\ \text{kg}=0.2471\ \text{kg}=247.1\ \text{g}\\
m_{\text{Ar}}&=0.01\cdot1.1766\ \text{kg}= 0.0118\ \text{kg}=11.8\ \text{g}
\end{align}
Now that we have the masses involved, we can convert to moles using their mean atomic masses:
\begin{align}
n_{\text{N}_2}&=917.7\ \text{g}/28.013\frac{\text{g}}{\text{mol}}=32.762\ \text{moles}\\
n_{\text{O}_2}&=247.1\ \text{g}/31.9988\frac{\text{g}}{\text{mol}}=7.7222\ \text{moles}\\
n_{\text{Ar}}&= 11.8 \ \text{g}/39.948\frac{\text{g}}{\text{mol}}=0.29538 \ \text{moles}
\end{align}
Having now obtained the number of moles of each gas in our hypothetical approximation to air, we can now use equation (\(1\)) to calculate the amount of internal energy each gas contributes to the whole.
\begin{align}
U _{\text{N}_2}&=\frac{5}{2}\cdot32.762\ \text{mol}\cdot8.314\frac{\text{J}}{\text{K}\cdot\text{mol}}\cdot300.00\ \text{K}=204.3\ \text{kJ}\\
U_{\text{O}_2}&= \frac{5}{2}\cdot7.7222\ \text{mol}\cdot8.314\frac{\text{J}}{\text{K}\cdot\text{mol}}\cdot300.00\ \text{K}=48.12\ \text{kJ} \\
U_{\text{Ar}}&=\frac{3}{2}\cdot0.29538\ \text{mol}\cdot8.314\frac{\text{J}}{\text{K}\cdot\text{mol}}\cdot300.00\ \text{K}=1.105\ \text{kJ}
\end{align}
This gives us a total of
\[ U _{\text{N}_2}+ U_{\text{O}_2}+ U_{\text{Ar}}=253.5\ \text{kJ}\]
That...actually turns out to be a bit more than I was expecting. That's a quarter of a million joules of energy contained in the motion and rotation of the air molecule in a single cubic meter of air.
To put this number in perspective, let's do some conversions to units you may be more familiar with. That many kilojoules is almost exactly 60 kilocalories (or Calories), the unit the energy in food is measured in. Put another way, the normal energy needs of an adult human are typically pegged at around 2,000 Calories per day. If you could somehow extract the energy from air, you'd need only about 33 cubic meters of air per day to survive, a volume smaller than the amount of air in most average-sized homes. Alternatively, the average amount of solar power over a 1 square meter area at the Earth's surface is about 1 kilojoule per second (1 kilowatt), so the amount of energy we calculated is equivalent to the amount hitting an area of 253,500 square meters (a quarter of a square kilometer) every second during full daylight. There's a lot of energy locked up in the air around you.
In a sense, though, I suppose I really shouldn't be too surprised. Gas molecules in the air whiz about at great speed, and this speed comes from the kinetic energy they have. In fact, we can estimate the root-mean-square speed of a typical nitrogen molecule fairly easily (the M is the molar-mass of the gas, in kg/mol):
\begin{align}v_{\text{rms}}&=\sqrt{\frac{3RT}{M}}\\
&=\sqrt{\frac{3\cdot 8.314\frac{\text{J}}{\text{K}\cdot\text{mol}}\cdot300.00\ \text{K}}{0.028013\frac{\text{kg}}{\text{mol}}}}\\
&=516.8\frac{\text{m}}{\text{s}}
\end{align}In case you're wondering, that a whopping 1,156 miles per hour. Those nitrogen molecules are, on average, moving about that fast (oxygen and argon move a bit slower, since they're more massive). So I guess when you consider billions upon billions of tiny atoms all zooming around at speeds comparable to this, it makes sense that there's a lot of energy tied up in their motion as kinetic energy. Wow. Amazing stuff.
Tuesday, November 13, 2012
Making Fudge.
Today I made fudge for the first time, and am currently munching on the first-fruits of my labors. Well, labors may be too strong a word – the whole process took fifteen minutes from start to finish, tops. It turned out to be easier than I was expecting, though it was still a good learning process. Some things I learned:
- If a recipe includes phrases like “stirring constantly” in it, it's probably a good idea to get any ingredients that come later in the recipe ready before becoming trapped in a cycle of time-critical stirring from which you can't break away.
- Pure vanilla extract? Very strong flavor. Very, very strong. Discovered this after spilling a bit (due to the hasty way I was rushing to open the bottle) and idly licking it off my fingers. I'd heard that before, of course, but wasn't quite expecting that particular burst of flavor.
- Molten fudge has a consistency close to that of pāhoehoe lava, if the shapes it formed as it cooled and congealed in the pan are any indication. Especially so soon after my trips through the Kaumana lava tubes, I was struck by the many similarities between the rock formations there and the fudge formations that formed in my pan. Fudge: chocolate lava. Or is it lava: rock fudge? Fudge:chocolate::lava:rock? (If you'll pardon the logical formalism.)
Friday, November 9, 2012
Cave Photography, Part 2
As promised in my last post, here are the pictures from the second part of my latest spelunking trip. I'd have had it up earlier but for working quite a bit over the last week and not feeling up to the task of writing this post, which will probably take me at least an hour.
Anyway, after exiting from the mauka side (uphill, left in this case) of the cave, we proceeded into the makai side (downhill, right in this instance). This side of the tube has a much larger entrance that allows light to shine much further into it.
I was so enthralled with the view back out the entrance, that it took me a few minutes to turn around and actually look inside the cave. When I did, imagine my surprise and delight to find an amazing example of a tube-in-tube formation not more than fifty feet into the cave!
A tube-in-tube is a structure that forms inside lava tubes for reasons that have to do with why lava tubes form in the first place. As the lava level in the tube drops, it begins to cool and can eventually form a hard crust on its surface within the original tube. Sometimes this crust can break in places when the volume of lava coming through the tube picks up again, and you get this neat effect where the rim of the break is coated in a layer of smooth, liquid-looking rock where the lava surged out of the hole, then flowed back in.
Anyway, one of these formations lies just within the makai opening.
In the picture you can see the extremely smooth rock around the edges where the lava surged up and down, and also the rougher rock forming the crust over the channel in the middle.
Counter-intuitively, the tube-in-tube formation doesn't exactly cover the entire floor of the lava tube. Instead, it has these sort of ridges (officially called “levees”) that stand up vertically out from the walls of the tube roughly parallel to them and act as the sides of the channel. Already at this point they're much more pronounced than they ever are in the mauka side of the tube, but further on they're even more impressive. You can kind of see the gap between the levee and the wall in the bottom-left corner of the picture.
This picture does a better job of capturing the view, although the walls and ceiling are still a bit brighter than they appear to the eye.
One thing that struck me about the makai side is that light from the entrance is visible much further in than it is on the mauka side. This picture is probably between a hundred and two hundred feet in, and the opening is still visible. Compare to the mauka side, where the nature of the entrance is such that by fifty feet in it's pretty much pitch black.
Another thing I'm learning from all this cave photography is the importance of shadow for establishing depth, and the need to keep in mind that in a cave, you make your own shadows. It's an interesting learning experience.
Remember those levees I mentioned earlier in the post? Here's a shot showing a nice example of one.You can see how it sits about a foot from the wall, and closely parallels it, even around curves. Here the crust on top of the tube-in-tube formation wasn't strong enough to avoid collapse when the lava flowing through it dried up, leaving only the stronger sides as levees.
Further on down the cave, the ledges on either side of the tube come together, and you have to climb up about waist height onto a thick ledge to continue. The lava flows in the area make some really strange looking shapes.
This part of the cave is very interesting, as the tube is split roughly in half by a ledge of reddish congealed lava of varying thickness. Holes appear in it periodically where lava surged up through the cooling crust and flowed back down. In the area beneath are some really nice examples of pāhoehoe lava:
Finally, at the point we reached before having to turn back due to prior engagements the ledge again split into two ledges on the sides of the tube before disappearing entirely as the whole tube abruptly shrank in size, in a manner very reminiscent of a river coming together before entering a narrow canyon to form rapids.
All in all, it was a fascinating journey, and I would love to go back and go all the way through. Since the next part of the cave appears to be some sort of “lava rapids”, I expect it should be pretty cool. Next time though I need to remember to bring gloves for crawling around, as the makai side seems to have a lot more low-hanging areas best suited to crawling than the mauka side. A hui hou!
Anyway, after exiting from the mauka side (uphill, left in this case) of the cave, we proceeded into the makai side (downhill, right in this instance). This side of the tube has a much larger entrance that allows light to shine much further into it.
 |
| View from just inside the entrance, with the steps from last post in the background. |
A tube-in-tube is a structure that forms inside lava tubes for reasons that have to do with why lava tubes form in the first place. As the lava level in the tube drops, it begins to cool and can eventually form a hard crust on its surface within the original tube. Sometimes this crust can break in places when the volume of lava coming through the tube picks up again, and you get this neat effect where the rim of the break is coated in a layer of smooth, liquid-looking rock where the lava surged out of the hole, then flowed back in.
Anyway, one of these formations lies just within the makai opening.
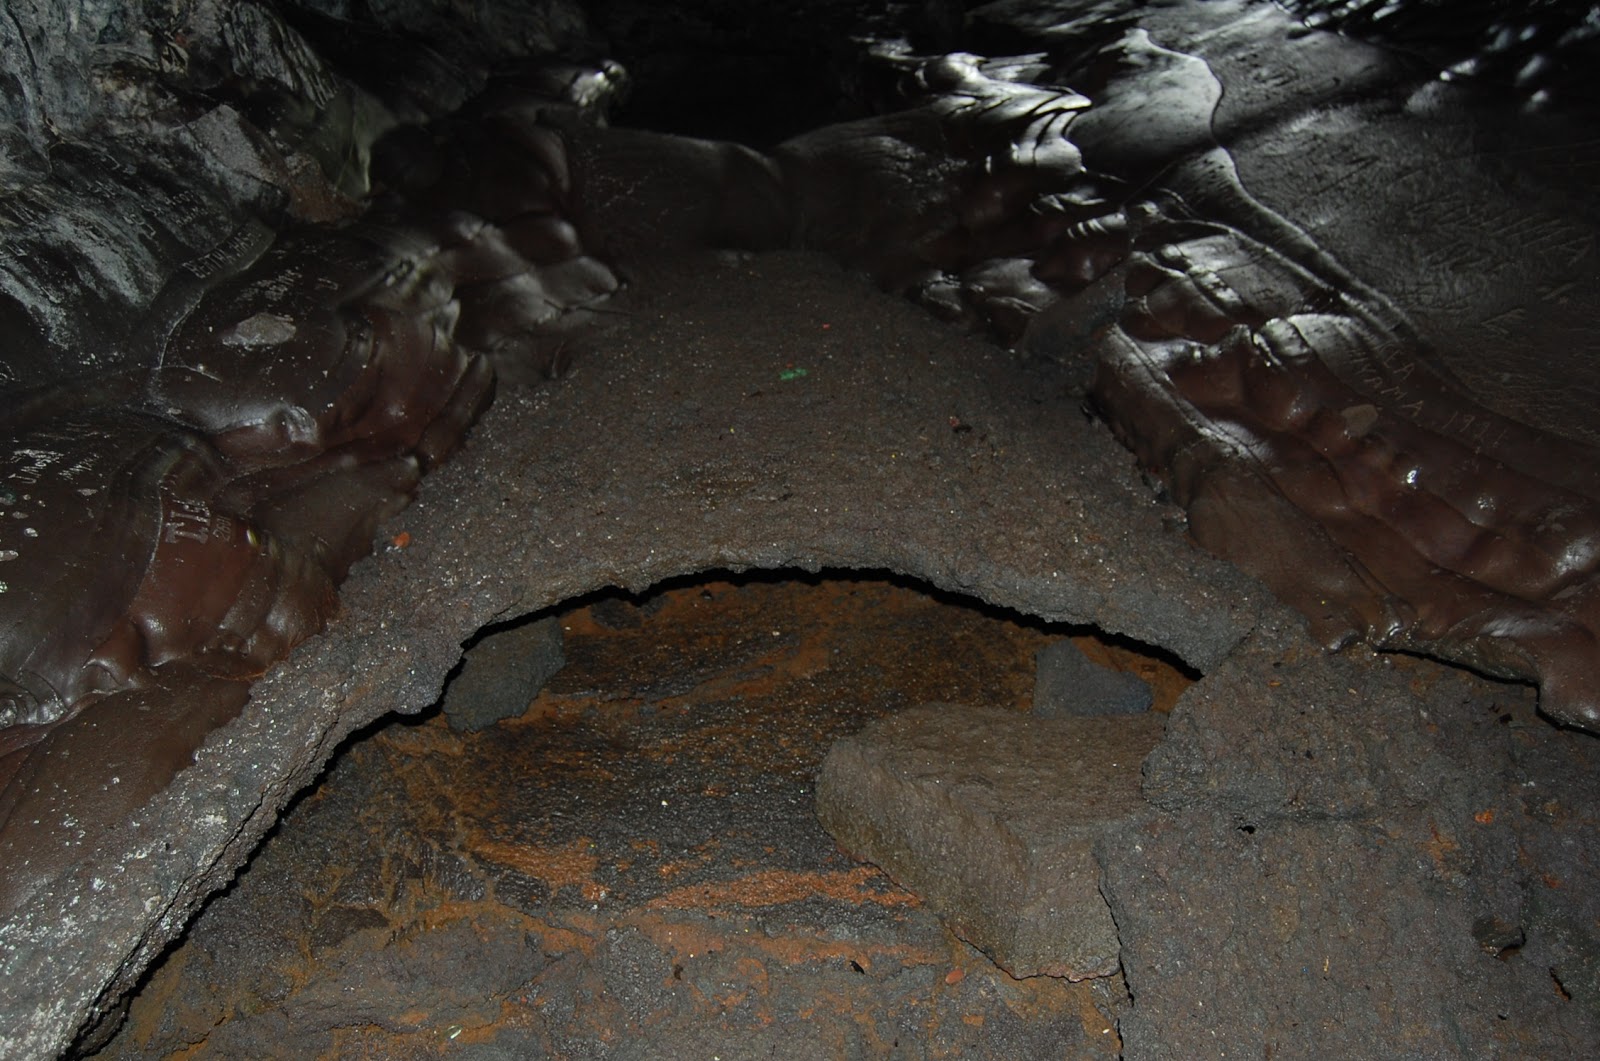 |
| Tube-in-tube formation just inside the cave, looking back. |
 |
| View of the cave entrance from just beyond the tube-in-tube formation. |
 |
| Same view without flash to better capture the feel of the cave. |
 |
| Another view of the entrance from further in. Note the hanging roots and sulfur on the walls. |
 |
| I believe this is a mild case of what are called “shark-tooth stalactites”. |
 |
| Example of a levee. |
 |
| More of the levee on the floor, and a ledge above it about waist high. |
 |
| Hardly looks like solid rock, does it? |
 |
| Pāhoehoe lava in the lower half of the lava tube. |
 |
| Here you can see one of the holes where ledge was especially thick. |
Finally, at the point we reached before having to turn back due to prior engagements the ledge again split into two ledges on the sides of the tube before disappearing entirely as the whole tube abruptly shrank in size, in a manner very reminiscent of a river coming together before entering a narrow canyon to form rapids.
 |
| Here the ledge splits apart again before the tube narrows. This rock may have been placed by lava. |
Friday, November 2, 2012
Cave Photography, Part 1
This past week my friend and I were able to get back to the Kaumana lava tube for some more exploring. Last time we had noticed a small tunnel branching off from the main tube on the uphill side that we wanted to explore, and of course the entirety of the downhill side was as yet unexplored. This time around, armed with a good flashlight and the knowledge I learned from writing my last post I took a lot more pictures. So many more that I'm going to break this post into two pieces. Today I'll post about our second trip into the uphill side, and Monday I'll try to finish detailing our trip downhill.
After making a circuit completely around the skylight to get a good view, we proceeded into the uphill side a second time to find the branching tunnel.
One neat thing I discovered while researching terminology for my last post was the concept of “lava balls”, basically chunks of rock that fall into the lava (perhaps collapsing off the ceiling) and get carried along like a leaf in rapids, picking up additional layers of lava as they go much as a snowball rolling down a hill accretes snow.
Also, from the various reading I've done, I think that the mineral coating the walls that makes the white color may be gypsum, as it seems to like to crystallize on the walls of lava tubes.


Another cool feature I noticed (now that I knew to look for it) was extruded lava. Basically, this is where lava in the cave wall is forced out as it cools. Because it's cooling, however, it has a consistency roughly akin to syrup, so it just sort of dribbles out. Once I noticed this feature, I started seeing them all over.
This particular structure here is another, rarer, example of the same phenomenon. It's known as a tubular helictite, and comes about as cooling lava is forming a stalactite, but the fact that it's cooling causes it to crystallize and bend in different directions. These structures are fairly rare to begin with, and are easily broken by humans, so I was quite excited to actually find one.
Honestly, this picture is just to show off the amazingly vivid reddish-orange colors of the cave more than anything. Cave photography is similar to astrophotography in that these colors don't really appear to the eye, unless perhaps you have a very powerful light. A camera flash qualifies as such, so it's able to capture some of the beautiful colors found here underground.
As we were walking up towards where we'd seen the entrance to the side tunnel, we noticed what looked like another such entrance. In our new “explore everything” mode we decided to see where it went, only to find that it connected back to the main tube after a mere 30 feet, and in fact turned out to be the opposite end of the side tunnel we were originally meaning to explore. It was cool, a smaller tube about 7-8 feet tall and maybe 5-6 feet wide.
On the main tube floor near the other end of the side tunnel, I found some neat pāhoehoe features frozen in the floor.
Another source of color in the caves are the occasional sulfur deposits seen on the walls. I think the yellow color is quite pretty.
Finally, as we were heading back to the entrance, I noticed this little formation along the wall. It's hard to see in this picture, but the red area is slightly depressed compared to the rest of the floor. It's the beginning of what's called a “gutter” – a small trough that forms along and parallel to the walls of the tube as the lava inside begins to cool on the outsides and forms a smaller tube-within-a-tube for itself. I was quite excited to see one after reading about them, but little did I know that compared to the ones I was about to see, this one would be so small as to hardly warrant a mention.
Anyway, that's it for this post! Tune in next week when I have pictures of (a section of) the downhill side of Kaumana Caves! Spoiler: there's a lot of even cooler stuff in it.
After making a circuit completely around the skylight to get a good view, we proceeded into the uphill side a second time to find the branching tunnel.
 |
| A picture of the lava flow of 1881 near the mouth of the cave. This is what 130-year-old lava looks like. |
 |
| I actually got a shot of the entrance to the uphill side this time. |
 |
| These are the steps going down into the tube. And my feet. |
 |
| Nice picture from just inside the entrance to the uphill side. |
 |
| Lava ball in the uphill side. |
Also, from the various reading I've done, I think that the mineral coating the walls that makes the white color may be gypsum, as it seems to like to crystallize on the walls of lava tubes.
 |
| A better picture of the numerous lavacicles that cover the roof in place. Watch your head! |


While traversing the cave this time, I noticed the opening seen in the picture on the left and was struck by a memory of my visits to Petra in Jordan. The picture on the right is from my visit in 2008, and shows the end of the wadi (or siq) by which one accesses the city nowadays. Through the gap is visible the famous “Treasury”, probably best known from Indiana Jones and the Last Crusade. Now that I compare the pictures side by side I guess it's not a great similarity, but it struck me when I saw it.
 |
| Extruded lava on the cave wall. |
 |
| Tubular lava helictite. |
 |
| Yet another example of cooling, extruded lava. This bit looks like a plate of spaghetti or something. |
 |
| Where the cave floor meets the "curb" at the wall. |
 |
| Entrance to small side tunnel. |
On the main tube floor near the other end of the side tunnel, I found some neat pāhoehoe features frozen in the floor.
 |
| It looks like water ripples, doesn't it? And yet it's solid rock. |
 |
| Sulfur deposits in Kaumana Caves. |
 |
| Tiny gutter along the wall. |
Anyway, that's it for this post! Tune in next week when I have pictures of (a section of) the downhill side of Kaumana Caves! Spoiler: there's a lot of even cooler stuff in it.
Tuesday, October 30, 2012
The Veil Nebula
Today, instead of pictures of spiders and caves, I have a picture of the lovely celestial object known as the Veil Nebula. Now, I'll have to be more precise than that: you see, the Veil Nebula as a whole refers to a humongous supernova remnant about 1,470 light-years away in the constellation Cygnus, the Swan. This nebula is quite large: it can be traced for almost 3 degrees in the sky, making it 6 times wider than the full Moon (and about the width of the Andromeda galaxy), while covering 36 times the area. Because it is such a diffuse ball of gas spread over such a large area (nearly a hundred light-years), it is easiest to see around the edges.
There are a few places where those edges are thicker and easier to see, and it is one of those edges that I have for you to see today. This part is known as the Western Veil nebula, and is one of the two brightest portions of the nebula. Because the nebula is so tremendously huge on the sky compared to most objects, different parts of it have actually been assigned their own numbers in the New General Catalogue (NGC). This part is known as NGC 6960.
So in this picture, you can see part of the outer arc of the supernova remnant where it's a bit thicker than average. The original explosion site was to the right and slightly below this picture, and if you look closely to the right of the bright part of the nebula you can see very faint and wispy filaments of gas. The nebula looks sort of purple-ish to me; the blue light comes from doubly-ionized oxygen, and I suspect that the red light is your basic hydrogen-alpha.
There are a few places where those edges are thicker and easier to see, and it is one of those edges that I have for you to see today. This part is known as the Western Veil nebula, and is one of the two brightest portions of the nebula. Because the nebula is so tremendously huge on the sky compared to most objects, different parts of it have actually been assigned their own numbers in the New General Catalogue (NGC). This part is known as NGC 6960.
 |
| The Western Veil Nebula, NGC 6960, in Cynus. The bright star is an unrelated foreground star, 52 Cygni. |
Monday, October 29, 2012
Spiders and Spelunking Pictures
After exploring the uphill ("mauka") side of Kaumana Caves last week, I got a few pictures of the trip from my friend. Now, while I hate having my picture taken in any sort of “candid” form, or your standard “everyone stand together and say ‘cheese’!” moment, I do enjoy hamming it up for the camera on occasion. With that said, here are a few pictures of me in the caves:
If you read the post title and are wondering where the spiders come in, wonder no more. It involves my first encounter with the Heteropoda venatoria, also known as the brown huntsman spider or (in Hawaii) the cane spider.
The story begins this Sunday, as I was riding home from church on my moped, when I thought I felt something move in my hair inside my helmet, which I had left on the moped seat outside during the service. Of course it happened while sitting at a red light, leaving me with a burning desire to get to the side of the road and get my helmet off as quickly as humanly possible. When I did, imagine my consternation at finding a cane spider with a good 3-inch leg-span running around frantically inside my helmet.
I'm a bit of an arachnophobe when it comes to spiders larger than a dime that move super fast, and according to Wikipedia cane spiders are “very easily alarmed” by humans, so I think it's safe to say that both of us were pretty much equally terrified. I dropped my helmet, and the spider ran out (and boy let me tell you, those suckers move fast).
At this point, I'm proud to say that my scientist instincts kicked in and my curiosity mastered the powerful urge to flee blindly in panic (especially when the spider ran right at my feet). Quickly whipping out my camera I was able to get the following two pictures of the spider before it ran off:


I'm not sure what it is about making first contact with Hawai‘i's creepy-crawlies in my hair (see: my first encounter with a centipede), but I'm really hoping this doesn't become a trend.
 |
| “After hours of contemplation, I have concluded: this is, indeed, a rock.” (I've got quite The Thinker vibe going on here, don't I?) |
 |
| This is the entrance to a neat little side tunnel off the main tube that I'd like to explore sometime. |
 |
| I really, really like this picture. This is the skylight that reminded me of Portal 2. |
If you read the post title and are wondering where the spiders come in, wonder no more. It involves my first encounter with the Heteropoda venatoria, also known as the brown huntsman spider or (in Hawaii) the cane spider.
The story begins this Sunday, as I was riding home from church on my moped, when I thought I felt something move in my hair inside my helmet, which I had left on the moped seat outside during the service. Of course it happened while sitting at a red light, leaving me with a burning desire to get to the side of the road and get my helmet off as quickly as humanly possible. When I did, imagine my consternation at finding a cane spider with a good 3-inch leg-span running around frantically inside my helmet.
I'm a bit of an arachnophobe when it comes to spiders larger than a dime that move super fast, and according to Wikipedia cane spiders are “very easily alarmed” by humans, so I think it's safe to say that both of us were pretty much equally terrified. I dropped my helmet, and the spider ran out (and boy let me tell you, those suckers move fast).
At this point, I'm proud to say that my scientist instincts kicked in and my curiosity mastered the powerful urge to flee blindly in panic (especially when the spider ran right at my feet). Quickly whipping out my camera I was able to get the following two pictures of the spider before it ran off:


I'm not sure what it is about making first contact with Hawai‘i's creepy-crawlies in my hair (see: my first encounter with a centipede), but I'm really hoping this doesn't become a trend.
Saturday, October 27, 2012
Another Tsunami Warning
You may have heard from the news recently of a magnitude-7.7 earthquake off the coast of Canada that generated a tsunami warning for much of the Pacific. I'm doing fine as usual, safe two blocks beyond the evacuation zone, and as of 11 P.M. there hasn't been much activity beyond a few tiny swells. This tsunami isn't estimated to be very large (like the last two I lived through), but the thing that makes tsunamis dangerous is that they're notoriously difficult to predict. They can wrap around islands and sometimes the most powerful wave can be on the opposite side of the island from the direction it came from.
Anyway, I'll let you know if anything major comes out of this one. The fact that tsunamis come about once a year but are generally not large enough to do too much damage tends to make one a bit nonchalant about them.
Anyway, I'll let you know if anything major comes out of this one. The fact that tsunamis come about once a year but are generally not large enough to do too much damage tends to make one a bit nonchalant about them.
Tuesday, October 23, 2012
Kaumana Cave Crawling
Located a little ways beyond the outskirts of Hilo just off Kaumana Drive is Kaumana Caves County Park. The eponymous caves are actually the remains of a lave tube formed during the 1881 eruption of Mauna Loa that came within a few miles of wiping out Hilo. Lava tubes come about during an eruption when the surface of the flow cools and forms a crust beneath which lava continues to flow, eventually concentrating into channels that may eventually empty of lava and become hollow. Sometimes the roofs of these channels collapse in “breakdowns” (making “entrances” or “skylights”), places that you can potentially climb down and enter the tube. The Kaumana Caves County Park contains one such entrance at an elevation of about 1,000 feet with a handy flight of steps leading down to the lava tube floor. (There's a neat site here with some good pictures that explains many of the terms used in lava tubes.)
Anyway, the point of this post is that last Sunday I had the chance to explore the caves for myself for the first time, along with a co-worker who had never been before either. Upon descending the steps into the skylight in the park, we were immediately faced with a choice: left or right (since the skylight is in the middle of the tube, it continues both uphill and downhill on either side).
We chose to investigate the left-hand (uphill, or mauka) side, because I'd heard that it was a bit shorter than the right-hand side. So, not the side that I actually took a photo of. The entrance to the left side looks similar except that it appears to end in collapse a short way in. It doesn't, but it may not be immediately obvious.
While this isn't exactly what I would term a dangerous cave in the sense that you don't have to worry about slipping and falling dozens of feet onto stalagmites at the bottom of a pit, it is very definitely a cave left very much in its natural state. Unlike the more famous Thurston lava tube near Kīlauea which has a smooth floor and electric lights installed, the Kaumana lava tube has a much rougher floor in places due to collapse of the roof and has no artificial lights of any kind.
Surprisingly, I wasn't able to find much information about the cave online, other than that it was formed by the 1880 eruption of Mauna Loa which everyone agreed on. Various sites listed distance up to 22 miles long if it weren't for roof-collapses that blocked the tunnel; however, a site I found listing the world's longest lava tubes ranked the Kaumana lava tube at #63, at 1.365 miles in length.
(Interestingly, the top four longest lava tubes in the world are all on Hawai‘i island, and are all over 10 miles long. Emesine Cave, the fourth-longest at 12.89 miles, was also formed by the same 1880 eruption of Mauna Loa as Kaumana Caves, and is located further up the flank of the volcano. The longest one, called Kazumura Cave, is located about 20 miles south of Hilo, was formed about 500 years ago by an eruption from Kīlauea, and contains a whopping 40.7 miles of total length!)
Anyway, getting into the left entrance of the Kaumana Caves involves finding it first. It's not that hard to spot, but the lava tube mouth is somewhat obstructed by the roof collapse that formed the entrance that permits entering it in the first place, and it's not immediately obvious to the casual glance. Once inside, the view is spectacular. I'm finding myself at a loss for words to describe what it looks like. The rocks on the inside are so unlike anything I'd ever seen before that I had to keep telling myself that no, they weren't fake movie props from some Hollywood set. It's an excellent case of real life being stranger than someone could ever think up.
Once inside, I found myself surrounded by a fantastic menagerie of strange and fluid shapes. All about me were the cooled remains of once-molten, living rock now frozen into a bewildering variety of poses. The bizarre, colors, lumpy shapes, and uncharacteristically smooth surfaces were so far removed from my everyday perception of what rock is that my mind had a hard time recognizing the mysterious substance around me as mere stone. Light-reflecting minerals coated the walls and ceiling, throwing the light of my small headlamp back from a myriad facets like a multitude of tiny stars. Everywhere the colors red, black, and silver met my eye. It really was a surreal experience, a place unlike anywhere else I've ever been. They say a picture is worth a thousand words, and through the magic of the Internet I can simply show you a picture and stop fumbling for words.
The cave floor at this point was made up mostly of jumbled rock that had collapsed from the ceiling, and you can see the vivid red color present. This comes about because the rock cooled very rapidly, or so I've heard (anyone out there who can verify this?).
Present on the roof and walls of the cave was a mysterious silvery material that you can see in the picture as well. I don't know what this is, though I would suspect it's some kind of mineral that crystallized on the exterior of the rock as it cooled and hardened (from what I've read, it may be gypsum). It's incredibly beautiful, and reflects light in the dark cave environment like you wouldn't believe.
The lava tube also contains lots of lavacicles – which are similar to icicles, just with molten rock rather than water. They form as the lava level in the tube recedes, leaving a clear space near the top where lava can stick to the ceiling then freeze in place as it cools and drips down.
Once inside a little way from the entrance, the floor changed from jumbled ceiling-collapse to a slightly smoother surface made up of the last lava to flow through the tube, frozen in place in all its wrinkled glory. This type of surface is known (quaintly enough) as “cauliflower ʻaʻā.” Pure ʻaʻā generally doesn't exist in lava tubes, but this is sort of a transitional form between smooth, ropy pāhoehoe and sharp, angular ʻaʻā.
As the flow of lava from the vent cracks of Mauna Loa subsided, so did the amount of lava flowing through the tube. Eventually the last little bit didn't have enough pressure behind it to push it downhill, so it froze in place making up a rough but not unpleasant walking surface (just watch your step! Everything is moist in here).
I just want to take a moment to remark on how difficult it is to get good pictures in caves like this without enough light for the camera to be able to auto-focus. Seriously, it's really hard. You might think that the astrophotographer, who spends time taking pictures in low-light environments, might have been able to foresee this, but no. I do know to be better prepared for the future, however. I ended up not actually taking too many pictures, something I hope to remedy next time (since there was certainly no lack of things interesting enough to be photographed).
Along the side of the tube wall in places there was a sort of shelf or curb where the lava slowly cooled from the edges in as the inflow was slowing down. You can see it in the picture below:
One thing that helped remind us that we weren't that deep underground (all things considered) was the amount of tree roots growing down from the ceiling. There were quite a few of them in places.
Another reminder was the presence of skylights at intervals:
While near the skylight seen above, I found some interesting features in the floor. It looks like fossilized bits of tree bark and possibly fern leaves.
Near the end of the cave system a breakdown in the tube let us scramble up the collapsed rock and emerge from its associated skylight. We felt that a nice walk overground was in order to get back to the car, so set off along what appeared to be a trail.
I should mention that we emerged in the middle of an ʻōhiʻa lehua forest with a lot of undergrowth of a particular fern-like plant that I didn't recognize, with no sign of civilization other than the noise of the occasional passing vehicle on Kaumana Drive. Looking on a map, I see that the exit point was no further than 300 meters (1,000 feet) from where we entered, but it felt like the middle of nowhere due to all the trees (it was also on the opposite side of the highway from where we started). The trail we were following very quickly began to appear and disappear as trails in forests are wont to due, so I had to pull out the GPS on my phone to make sure we were actually making our way back to the car.
Also very prominent on our minds was the fear of suddenly falling through a well-covered skylight hidden in the undergrowth. It wasn't always easy to determine what was solid rock footing, what was dirt or organic material, and what was leaves growing over a depression in the ground. ʻŌhiʻa trees don't really make good sticks for prodding the ground in front of you to see if it is in fact ground and not a gaping hole, so we took it slowly and carefully. Thankfully, between GPS and my good sense of direction we made it back to the parking lot where we'd parked without incident (beyond a few mosquito bites), although I'm pretty sure I was blazing my own trail for at least part of the time.
All that climbing around took a bit longer than we'd expected, and after forcing our way through the thick undergrowth we were both pretty tired, so we decided to put off exploring the makai (right-hand) side of the tube until next week, when we plan to return making use of what we learned from this expedition. (For instance, I was surprised at how warm it was in the caves, being used to thinking of caves as cool places. It was cooler than the outside air, yes, but not much, and also very humid so I worked up quite a sweat after scrambling around on rough lava rock piles for an hour and a half.)
Finally, a nice picture of one of the ʻōhiʻa trees we passed while returning:
Anyway, the point of this post is that last Sunday I had the chance to explore the caves for myself for the first time, along with a co-worker who had never been before either. Upon descending the steps into the skylight in the park, we were immediately faced with a choice: left or right (since the skylight is in the middle of the tube, it continues both uphill and downhill on either side).
 |
| Entrance to the right side of the Kaumana Caves lava tube. |
 |
| Warning sign at the bottom of the steps. |
Surprisingly, I wasn't able to find much information about the cave online, other than that it was formed by the 1880 eruption of Mauna Loa which everyone agreed on. Various sites listed distance up to 22 miles long if it weren't for roof-collapses that blocked the tunnel; however, a site I found listing the world's longest lava tubes ranked the Kaumana lava tube at #63, at 1.365 miles in length.
(Interestingly, the top four longest lava tubes in the world are all on Hawai‘i island, and are all over 10 miles long. Emesine Cave, the fourth-longest at 12.89 miles, was also formed by the same 1880 eruption of Mauna Loa as Kaumana Caves, and is located further up the flank of the volcano. The longest one, called Kazumura Cave, is located about 20 miles south of Hilo, was formed about 500 years ago by an eruption from Kīlauea, and contains a whopping 40.7 miles of total length!)
Anyway, getting into the left entrance of the Kaumana Caves involves finding it first. It's not that hard to spot, but the lava tube mouth is somewhat obstructed by the roof collapse that formed the entrance that permits entering it in the first place, and it's not immediately obvious to the casual glance. Once inside, the view is spectacular. I'm finding myself at a loss for words to describe what it looks like. The rocks on the inside are so unlike anything I'd ever seen before that I had to keep telling myself that no, they weren't fake movie props from some Hollywood set. It's an excellent case of real life being stranger than someone could ever think up.
Once inside, I found myself surrounded by a fantastic menagerie of strange and fluid shapes. All about me were the cooled remains of once-molten, living rock now frozen into a bewildering variety of poses. The bizarre, colors, lumpy shapes, and uncharacteristically smooth surfaces were so far removed from my everyday perception of what rock is that my mind had a hard time recognizing the mysterious substance around me as mere stone. Light-reflecting minerals coated the walls and ceiling, throwing the light of my small headlamp back from a myriad facets like a multitude of tiny stars. Everywhere the colors red, black, and silver met my eye. It really was a surreal experience, a place unlike anywhere else I've ever been. They say a picture is worth a thousand words, and through the magic of the Internet I can simply show you a picture and stop fumbling for words.
 |
| View back to the cave mouth (the green in the center) from about 6 or 7 meters in. |
The cave floor at this point was made up mostly of jumbled rock that had collapsed from the ceiling, and you can see the vivid red color present. This comes about because the rock cooled very rapidly, or so I've heard (anyone out there who can verify this?).
Present on the roof and walls of the cave was a mysterious silvery material that you can see in the picture as well. I don't know what this is, though I would suspect it's some kind of mineral that crystallized on the exterior of the rock as it cooled and hardened (from what I've read, it may be gypsum). It's incredibly beautiful, and reflects light in the dark cave environment like you wouldn't believe.
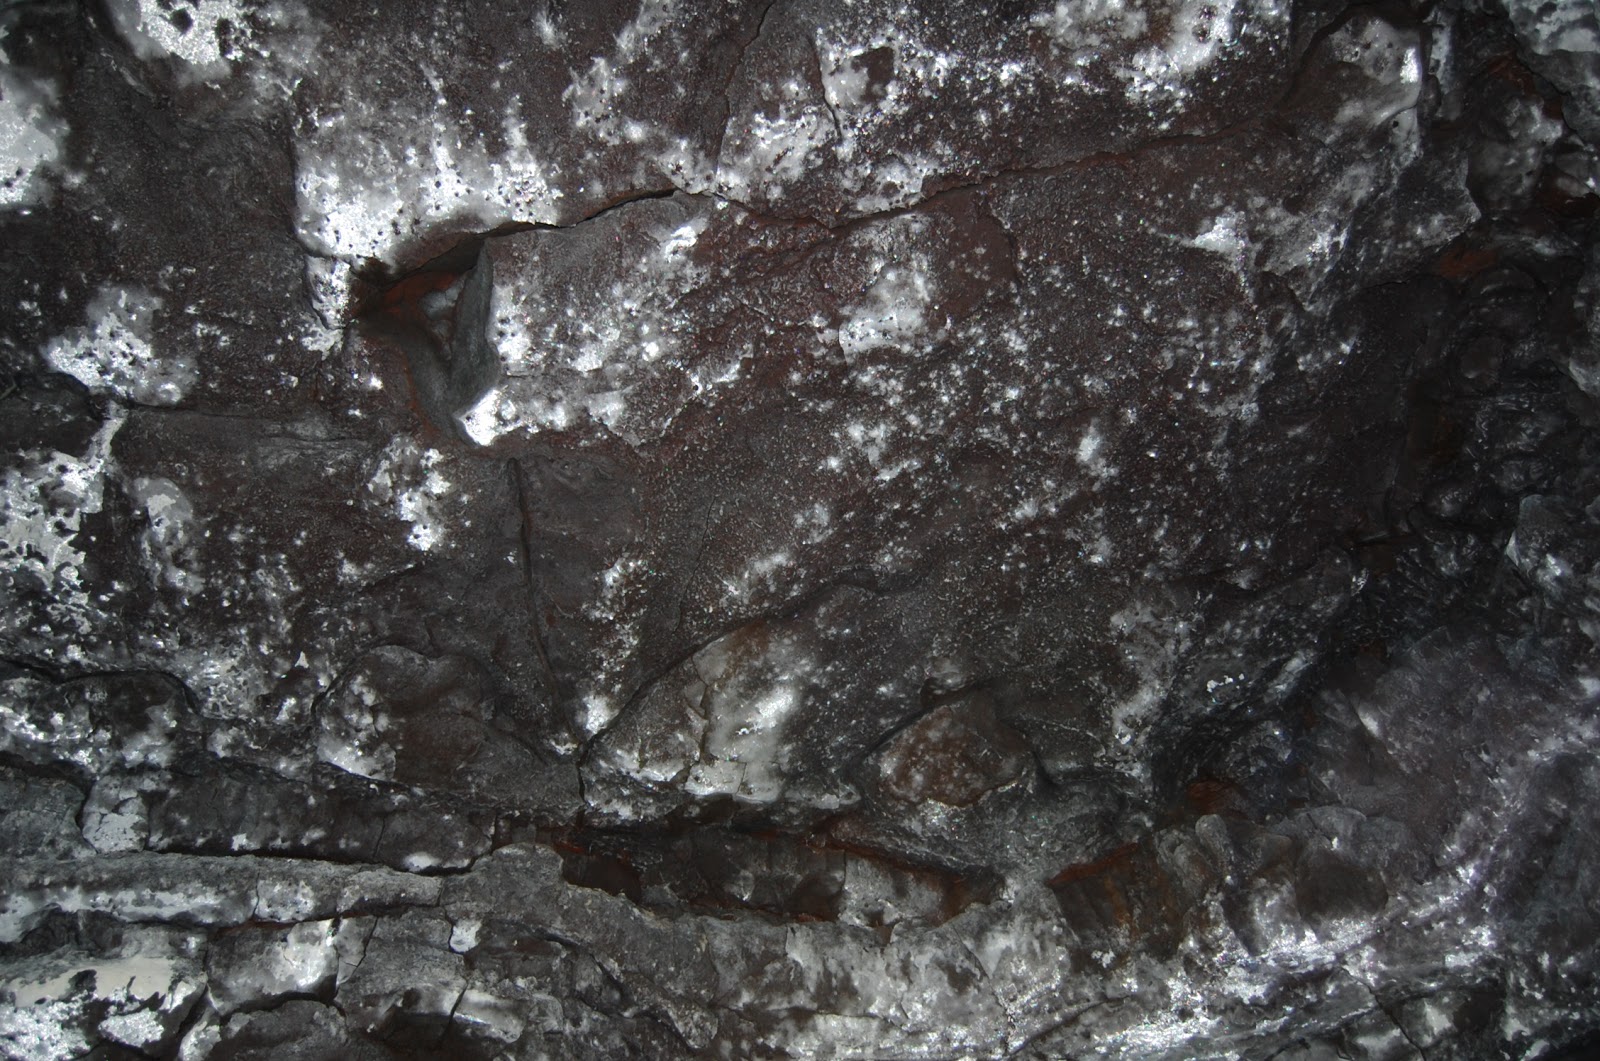 |
| A picture showing the cave ceiling where some of the rock as fallen away, revealing more of the mysterious silver mineral behind it. |
 |
| Lavacicles! Sorry about the blowout on the right there, this was my best picture of them. |
 |
| Another shot of another part of the ceiling. |
 |
| The last lava to flow through this tube, now frozen in time, makes up the floor of the cave for quite a while. |
I just want to take a moment to remark on how difficult it is to get good pictures in caves like this without enough light for the camera to be able to auto-focus. Seriously, it's really hard. You might think that the astrophotographer, who spends time taking pictures in low-light environments, might have been able to foresee this, but no. I do know to be better prepared for the future, however. I ended up not actually taking too many pictures, something I hope to remedy next time (since there was certainly no lack of things interesting enough to be photographed).
Along the side of the tube wall in places there was a sort of shelf or curb where the lava slowly cooled from the edges in as the inflow was slowing down. You can see it in the picture below:
 |
| At top you can see the cave wall, then the curb in the middle, and the cauliflower ʻaʻā floor at bottom. |
 |
| Masses of tree roots hanging down over some roof-collapse rubble. |
 |
| Skylight in the tube. This scene looks like something you'd find in the early levels of Portal 2. |
 |
| Fossilized organic material embedded in the lava making up the tube floor. |
 |
| More organic material. Looks like tree bark, possibly from the abundant ʻōhiʻa lehua trees in the area. |
I should mention that we emerged in the middle of an ʻōhiʻa lehua forest with a lot of undergrowth of a particular fern-like plant that I didn't recognize, with no sign of civilization other than the noise of the occasional passing vehicle on Kaumana Drive. Looking on a map, I see that the exit point was no further than 300 meters (1,000 feet) from where we entered, but it felt like the middle of nowhere due to all the trees (it was also on the opposite side of the highway from where we started). The trail we were following very quickly began to appear and disappear as trails in forests are wont to due, so I had to pull out the GPS on my phone to make sure we were actually making our way back to the car.
Also very prominent on our minds was the fear of suddenly falling through a well-covered skylight hidden in the undergrowth. It wasn't always easy to determine what was solid rock footing, what was dirt or organic material, and what was leaves growing over a depression in the ground. ʻŌhiʻa trees don't really make good sticks for prodding the ground in front of you to see if it is in fact ground and not a gaping hole, so we took it slowly and carefully. Thankfully, between GPS and my good sense of direction we made it back to the parking lot where we'd parked without incident (beyond a few mosquito bites), although I'm pretty sure I was blazing my own trail for at least part of the time.
All that climbing around took a bit longer than we'd expected, and after forcing our way through the thick undergrowth we were both pretty tired, so we decided to put off exploring the makai (right-hand) side of the tube until next week, when we plan to return making use of what we learned from this expedition. (For instance, I was surprised at how warm it was in the caves, being used to thinking of caves as cool places. It was cooler than the outside air, yes, but not much, and also very humid so I worked up quite a sweat after scrambling around on rough lava rock piles for an hour and a half.)
Finally, a nice picture of one of the ʻōhiʻa trees we passed while returning:
 |
| A mature ʻōhiʻa lehua tree at about 1,000 feet elevation near the entrance to the Kaumana lava tube. |
Subscribe to:
Posts (Atom)