Showing posts with label iron. Show all posts

Sunday, September 22, 2019

Pigment Palaver: Five Types of Black

There's a bit of received wisdom in the painting world that boils down to: “Don't use black paint.” The idea behind it is that black is essentially the lazy painter's shortcut. Instead of using a black pigment, so the advice goes, a painter should mix something very close to black from a mix of a few colors, since if you're painting from life very little of what we see is actually pure black, but rather just a very dark shade of a color (say, for instance, a dark shadow; mostly it's a very dark shade of whatever color the shadow is projected on).

Of course, I encountered this particular piece of received wisdom specifically in the form of advice saying to ignore it. While there's certainly value in trying to mix up your own blacks, you should also feel free to use the full range of pigments available. (I think it may also have originally applied to oil painting, with the point of the advice being that what might not have worked for oils may very well work for acrylics.) And, while artists may not encounter black much in the typical daytime landscape or still life, one place we do regularly encounter it is in the night sky. And since my very first painting was of a nighttime landscape, I picked up some black to paint the background.

In doing so, I discovered that the store sold not one, not two, but three different types of black. I picked one called Mars black essentially at random, on the basis that Mars was associated with iron, and iron oxide caused the colors of both Mars and Maunakea, but my interest was piqued. (Incidentally, Mars black is so-called precisely because of that association with iron, as its color comes from synthetic iron oxide particles.)

Perhaps half a year later, around January of this year, I came across a Kickstarter for what was being billed as the “mattest, blackest paint available to artist.” (Matte is just the opposite of glossy; a glossy black would still reflect a lot of light at certain angles, while a matte black would look much flatter and black from the same angle.) There's a bit of a backstory for this Kickstarter, going back to the invention of Vantablack in around 2014, a specially-grown film of carbon nanotubes that creates a black color that absorbs up to 99.96% of visible light incident on it. (For comparison, a typical black paint may only absorb ~95–97% of visible light.)

This was pretty cool, but then the company who created Vantablack licensed its use in art to a single person. This got some artists pretty upset, considering all the cool possibilities for something that black. One of them, a U.K. artist by the name of Stuart Semple, who'd been making his own pigments and art supplies for years as a side business, decided to make his own black paint that would be available for all artists. (I've mentioned his company, Culture Hustle, before, because that's where I got my glow-in-the-dark “Lit” paint.)

Anyway, Semple came up with a really nice, flat, matte, black paint called simply “Black,” then a few months later came up with an improved version called “Black 2.0.” These sold pretty well apparently, so he went back to the drawing board to come up with an even matter, flatter, blacker version (called, imaginatively enough, “Black 3.0”). This is where the Kickstarter comes in, as it was intended to fund an initial production run. I got interested enough to back it, and ended up with two bottles of Black 3.0 and a bottle of Black 2.0 as a bonus. (Interestingly, from what I can tell this Kickstarter is currently sitting at the ninth-highest funded campaign in the “Art” category.)

Oh, and somewhere along the line I picked up the two remaining black paints from the art store (ivory black and carbon black), so if you're keeping count I now have five different varieties of black paint. Last week I finally got around to comparing them with each other, by painting each of five 4×4 inch canvas panels a different black. Below are two pictures taken from different angles, showing all five pigments with the associated bottle or tube of paint.

From left to right: carbon black, ivory black, Mars black, Black 2.0, and Black 3.0.


Now, the pictures unfortunately don't really do justice to these different paints, but there are some subtle and not-so-subtle difference between them in person. For instance, carbon black, on the far left, is actually pretty glossy and shiny, certainly more so than any of the rest. (Carbon black is made of amorphous carbon—originally soot though it's manufactured now—and is probably one of the earliest pigments humans ever used.) On the far right, Black 3.0 is indeed the darkest, flattest, blackest (and newest!) of the blacks, and the rest fall in slightly different places between the two extremes. (Another interesting difference between them is how they feel: they tend to get rougher from left to right, to the point where I physically dislike the feel past about Mars black in the middle.)

Incidentally, if you're wondering what color black I used for the background of my various space pictures so far, I'm not sure. That's because I used Matisse Black Gesso to prepare the background, which doesn't say what the black pigment (or pigments) used was. I think it might be either Mars black or ivory black based on the general level of glossiness and look, but I haven't directly compared it to my fancy new paint swathes yet. (Edit: having done so, I think it looks closest to ivory black, though it's not a perfect match; this might be because gesso isn't just paint but also includes things to make it provide a good painting background, so even with the same pigment it might come out looking slightly different.)

Anyway, welcome to the exciting wide world of black acrylic paint. I have an idea for that Black 3.0 which I'm excited to get to started on soon (hopefully I finish up my current large project this week so I can get to work on it), and I'll see what uses I can put the rest to in the future. Maybe some painting of black lava rock from Hawaii? We'll see! A hui hou!

Saturday, August 31, 2019

A Second Exhibition: Earth, Moon, and Mars Paintings

I've been incredibly busy this past month getting ready for my Mid-Candidature Review, which I passed on Thursday. (This wasn't helped by me coming down with a moderate case of the flu last week.) All of which meant that I didn't really mention here the exhibition I had some paintings in as part of the 50th anniversary of the Apollo 11 Moon landings, which was partly because I never even got to visit the gallery and see everything in person. (And yes, this means I'm now a twice-exhibited artist! Maybe I should add that to my résumé…)

Thankfully, my friend James at Swinburne visited and took some pictures for me, so you all get to see them after all. (All these pictures are courtesy of him; you can check out his website here.)

“Main Sequence”
The first one is one you've seen before, my series of stars on the main sequence. Here, though, they're arranged similarly to how they would be located on a Hertzprung-Russel diagram, from which the main sequence was first identified. This is how I'd always envisioned hanging them if I got the chance, so it was pretty cool to see.

“Tenuous Transport.” Individual panels 40×40 cm, or 40x80 cm. Acrylic, embroidery on canvas.
Now, this is an interesting one. It's a four-panel work (or tetraptych), of which I've posted the Moon painting before. The rest are new, however, and they're not all mine! This piece is a collaboration with another Swinburne student, Grace, who embroidered the outline of the Eagle (the Apollo 11 lander) on the second panel from the right. I had originally envisioned this piece as a single new panel, but while discussing it with everyone at one of our art workshops the topic of making it a multi-part collaborative effort came up, and since I already had the Moon painting it was a simple matter to paint a matching Earth painting to go with it. (Plus a few stars on a blank panel.) Grace meanwhile stitched the outline of the Eagle onto another canvas. The stitching and outline gave it a very fragile feeling, which led us to give the piece the name “Tenuous Transport” in recognition of the sheer fragility of the craft which carried the first humans to the Moon, and just how dangerous the journey was. (You definitely can't see it at this scale, but Grace also subtly highlighted some of the edges in the Moon in thread, making it an interesting mixed-media collaborative piece.)

Since it's probably not obvious at this size, the Earth painting is mostly looking at the Pacific Ocean; you can see Australia at the lower left, and the western coasts of North and South America on the right, but it's mostly water and clouds. Also now that I have it back I may go and touch up the shape of the terminator on the Earth a bit, as it doesn't quite match the Moon and it's been bugging me for a while.

“Vallis Marineris Afternoon Overlook.” 8×10 inches, acrylic on canvas.
And finally, here's a little piece I did unrelated to the Moon; instead, it's a view out over the colossal canyon Vallis Marineris on Mars. At least, that's what I intended, it never quite came together with the right perspective in my eyes, but at least the pink sky is really attractive. Much of the red color in this painting comes from iron oxide pigment, which is interesting because A) it's one of the first pigments people ever used for painting, as seen in cave paintings, and B) it's the reason for Mars' red color in the first place: iron oxide is rust. While I wouldn't call this one of my better works, it was still pretty fun to play around with some new colors I haven't really used before.

Anyway, those are some of the paintings I spent most of May, June, and the first half of July working on. Now that I've passed my Mid-Candidature Review I'm taking the next week off, which will hopefully allow me to get a lot of work done on the ones I've been working on since. A hui hou!

Friday, September 9, 2016

The Fictional Element Rant

As an astrophysicist, I enjoy a good science-fiction story as much as anyone. That same fact, though, also makes me pretty good at spotting where the authors are playing fast and loose with physics (for anything but the hardest of science-fiction). Many things I can accept as necessary for a story to work (superluminal travel, for instance), but there's one thing that can break my suspension of disbelief faster than almost anything else if handled poorly: fictional elements.

To see why, let's take a look at the periodic table, which summarizes what we know about the elements. To begin with we need to have a definition of elements themselves. Basically, all atoms have an integer number of protons in their nucleus, known as their atomic number. Atoms with the same number are the same element, and have the same attributes.

An element's atomic number uniquely identifies it.
An element's atomic number is so central to its identity, that it's the first thing I want to know about a new fictional element. And thence the problem: its atomic number can't be one, because that's hydrogen. It can't be two, because that's helium. It can't be three, because that's lithium, and so on all the way up to one-hundred and eighteen, the highest the period table goes at the moment (while elements with numbers 113, 115, 117 and 118 are not named yet, the International Union of Pure and Applied Chemistry is expected to approve names for them before the year is out).

And thus we see the problem that a fictional element (in a moderately hard science fiction setting) must overcome: all the elements up to a hundred and eighteen have been discovered already. Having a new element without further explanation feels to me like someone trying to tell me that they've discovered a new integer between 1 and 118; my immediate response is always going to be, “But we already know all of those integers.”

Now, while this is a problem, there are two approaches that I can see to justifying it:

  1. The easy way: give it an atomic number higher than 118. The problem with this is that everything we know about nuclear physics says that anything with such a number should decay so fast it'd be nearly impossible to detect. But this is science fiction we're talking about here. It's pretty trivial to throw in a section discussing why what we thought we knew about physics was in fact wrong, allowing stable high-atomic-number elements to exists. At the very least, lampshade it by having someone remark how they have no idea how such an element is stable, but it'll give the physicists and chemists something to work on! I've seen this done in a free game set in the Half-Life universe released recently called Transmissions: Element 120. They went with the route of explicitly disclaiming knowledge of how element 120 (the putative source of the game's gimmick) was so stable, but it showed to me that they had at least acknowledged that a problem existed and had thought about it, and it didn't break my immersion the way simply announcing some new element would have. (They even used what would be the correct chemical symbol for element 120, Ununbium: Uub).
  2. The slightly odd way: have the fictional element replace a real one. So this universe is like ours, except that, say, ruthenium is replaced by fictitium. I've never seen this used, and it would really only sort of paper over the problem, but it could be interesting if the replacement element is judiciously chosen. Elements that are uniformly highly radioactive and decay quickly might be good choices to replace; no one's really going to notice if astatine didn't exist, whereas history would be very different if iron didn't exist.

Of course, it's painfully obvious that most of the fictional elements that most badly break my immersion were only added to their respective settings to drive the plot (usually through opposing factions warring over it) and had no thought whatsoever given to them. To those needing such a plot driver, might I suggest a third path? Use an existing element, and give it a new property that explains why it's in such high demand. It's much easier to accept that an obscure element has suddenly become much more sought after due to a recent discovery than a totally new, never-really-explained element. Plenty of elements that were simply intellectual curiosities to their 19th-century discoverers are now critical components of modern items and infrastructure due to discoveries in the intervening time that could scarcely be imagined at the time they were discovered. (Various rare-earth metals being important in making high-end electronics, for one example.)

Note that this whole rant really only applies to science fictional settings of at least a moderately hard nature where it can be assumed that the periodic table exists. Mithril in The Lord of the Rings doesn't bother me because it's a fantasy setting. (You could also rationalize it as maybe being some real element that was unknown to any but the dwarves at the time. A light, strong, silvery metal could apply to aluminum, which is normally found in compounds but can very rarely occur in pure form as nuggets, explaining why it's only found in the mines of Moria. Just a fun thought exercise.)

Similarly, I don't mind if all the elements in a series are fictional. Star Wars goes this route, with the Expanded Universe (before Disney disavowed it) having probably dozens of fictional elements and minerals. That's interesting, and it gives you a lot of latitude in coming up with interesting elements. It's mixing real and fictitious elements (without justifying the latter) that really starts the smoke coming out of my ears as my brain tries to reconcile the fictional element with reality (for settings where it's assumed things are like reality unless specifically noted).

To put it simply, in science fiction stories, don't mix your real and fictitious elements without comment or justification, please. One or the other, not both.

Well, I don't know how interesting any of that was, but it's been buzzing about in my head for a while and I wanted to get it out. Sorry if I've now retroactively spoiled anyone's favorite story. A hui hou!

Sunday, July 21, 2013

Science Clock Series: Part V

Today's number comes from chemistry, and is given by:

\[\approx\text{sp. gr. Fe}^{2+}\,\text{Fe}_2^{3+}\,\text{O}_4\] The letters "sp. gr." stand for the term "specific gravity." Specific gravity  is the ratio of the density of a substance to the density of another substance, usually a reference substance of some kind.  The most common reference substance is liquid water which, as you may remember from the first post in this series, has a density of one gram per cubic centimeter.

The chemical formula \(\text{Fe}^{2+}\,\text{Fe}_2^{3+}\,\text{O}_4\) stands for the chemical compound iron(II,III) oxide with the chemical name ferrous-ferric oxide, found in nature as the mineral magnetite. (“Fe” and “O” being the chemical symbols for iron and oxygen, respectively.) The Roman numerals II and III refer to the oxidation state of the iron atoms in the compound, which are represented in the formula by the superscript +2 and +3 respectively. The oxidation state is basically how many electrons an atoms gains or loses while in a compound. Positive numbers indicate that an atoms has lost electrons (which have a negative charge), and negative means an atom gains electrons.

The subscript 2 and 4 refer to the number of atoms of that kind, so there are two \(\text{Fe}^{3+}\) atoms and four oxygen atoms. In a stable compound the oxidation numbers should come out to zero (no net electrical charge). Since oxygen atoms almost always have a \(-2\) oxidation state, they add up to give \(-8\) to the oxidation state of the compound. There is one iron atom giving +2, and two iron atoms giving +3, for a total of \(2+(2\times3)=+8\) to the oxidation state, which nicely balances the oxygens and helps ensure the compound is balanced and stable.

Ferrous-ferric oxide as it appears in nature in the form of magnetite has a blackish-brown color with a metallic sheen and has a density of approximately 5.17 grams per cubic centimeter, which gives it a specific gravity of 5.17 (relative to water). Magnetite is the most magnetic naturally-occurring material, and is also where the name magnetism comes from.

Check back next time for another number from chemistry! Click here to jump directly to it.

Sunday, April 14, 2013

Spelunking Emesine Cave, Part 2

So, when I left off in the last post, we had just made it to the single skylight in this section of Emesine Cave. Unlike the entrance, the collapsed rock in this one didn't afford an easy way of entrance or exit. We passed on back into the murky gloom of the cave, our night vision acquired over the previous 30 minutes gone once again.

Once we'd readjusted our eyes to the darkness, we started to see some amazing speleothems (a word referring to just about any kind of secondary mineral formation in a cave). Probably due in part to the lower flux of tourists in Emesine Cave, there are a lot of very fragile lavacicles still clinging to the roof of the cave along its length. Take a look at these beauties:


Lavacicles (I had to add that word to my browser's dictionary just now) form when the roof of the tube cools enough to form a sort of skin over still semi-molten material. As the temperature of this material drops, dissolved gases inside begin to precipitate out of solution, displacing molten material and forcing it out through the skin like toothpaste out of a tube. After they solidify they make excellent channels for water precipitating on the ceilings to run down, as you can see by the drops of water hanging from their tips.

If this sort of thing happens lower down on the walls rather than the ceiling, you get structures like those seen below:


Here's a close-up picture of a bit of lavacicle that I found broken-off on the ground for scale: they all tend to be about this thick. This one is solid on the inside (though you can't see it), but you'll see some later on that are hollow.


We found some really long lavacicles in places. This one was probably nearly a foot and a half long (it was on the ceiling some ten feet up, so I couldn't get a close look).


Some of the lavacicles were quite interesting. As I mentioned, lavacicles form from gasses bubbling out of molten material. The gasses apparently can flow out through the forming lavacicles, leaving them hollow. This leads to a sort of formation that appears very similar to a soda straw (a type of formation in karst caves that are formed differently, but look strikingly similar). You can tell that the lavacicles in the picture below were hollow because of the way they collapsed. I find these structure quite remarkable (as you can tell by how much I'm remarking on them).


This picture doesn't have anything specific I want to point out, I just loved the contrast between the various textures in the picture.


In places there were dozens of lavacicles hanging down from the ceiling. There were also roots, as there typically are in these lava tubes.


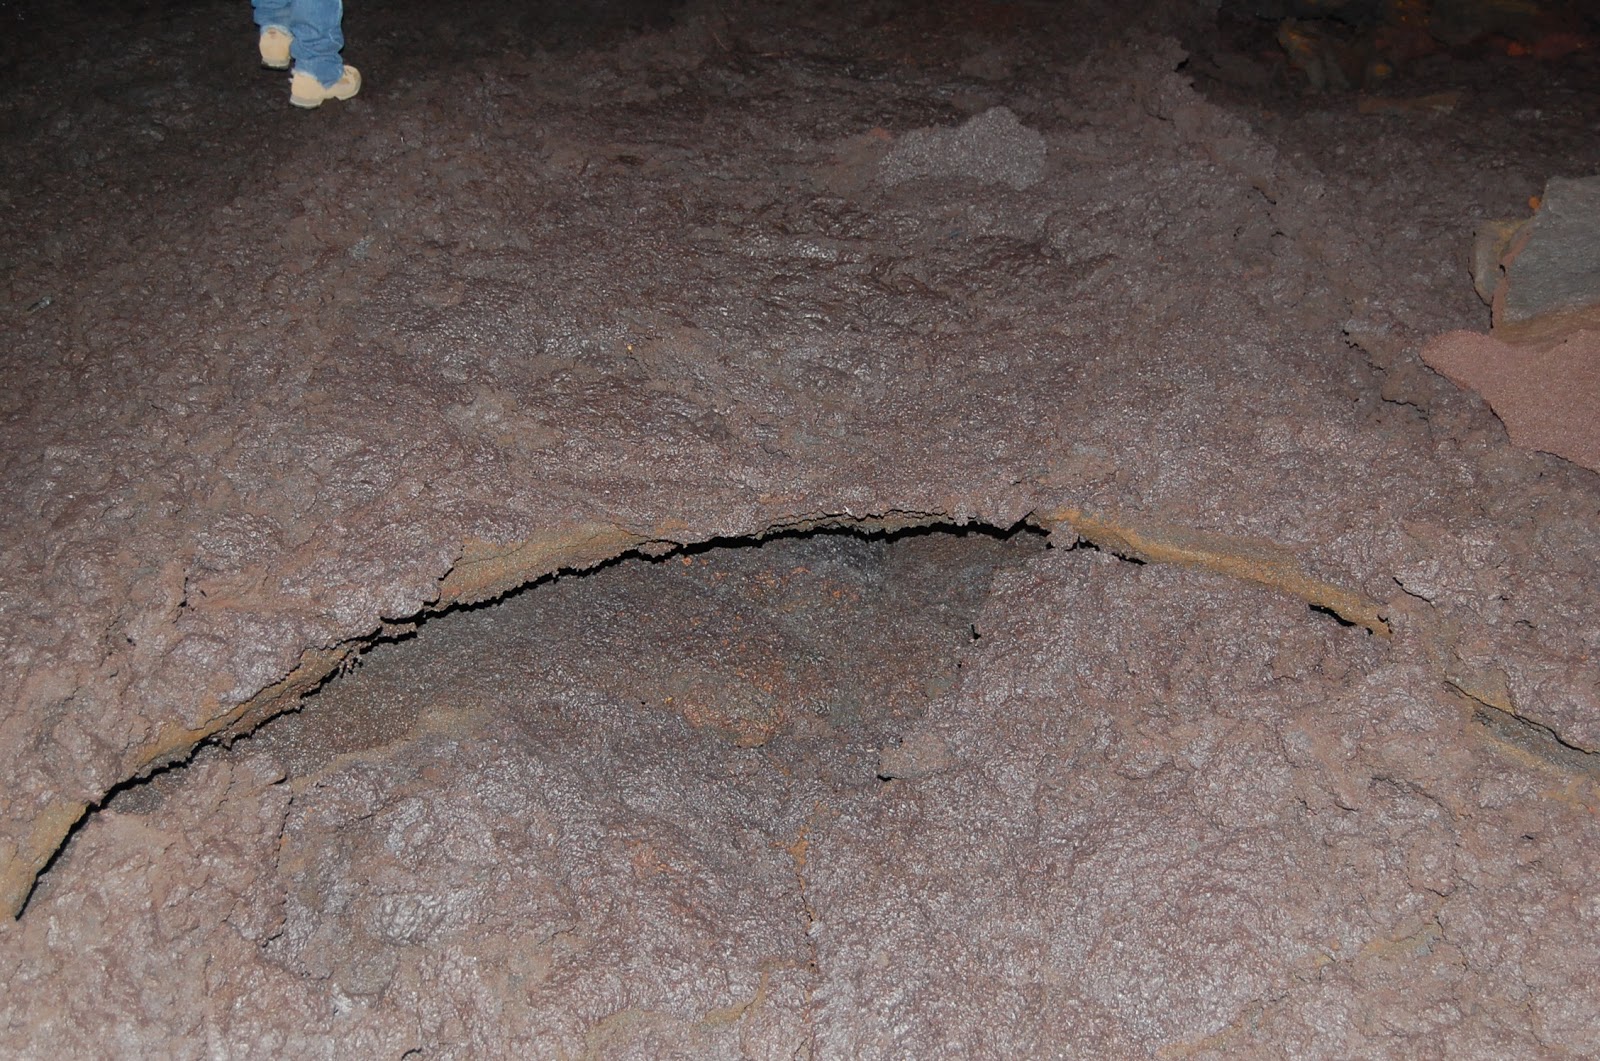
I found this little lump of anomalously-colored material at one point along the way. Dunno what's causing the orange color, though my guess is that it's iron.


Some more of those amazing flattened soda-straws, most of them flattened in two or more different directions:


There wasn't much in the way of tube-in-tube formations, but I did find some:


This picture is pretty neat. It's the cast of a tree that fell over into lava and subsequently burned up or rotted away after the lava had cooled. You can clearly see where the branches forked in this picture (looking towards where the fork splits from the direction the roots would have been). Interestingly, this cast is on the ceiling, so I don't know what specific sequence of events led to its creation.


Anyway, I think that's all for the pictures I took on our way into the cave. I still have some more to go through that I took on our way back out, but I think I'll save those for a third post as this one's already getting a bit long.

Sunday, October 17, 2010

Calculus and yogurt, with just a smidgen of algebra.

Mmm, Yogurtland. I went there again today, and once again it is delicious (‘ono in Hawaiian). As I write this, I'm savoring a mix of Pomegranate & Raspberry Tart, Arctic Vanilla, Blueberry Tart, and Double Cookie Crumble flavors, topped with kiwi slices, cookie dough minis, chocolate chips, strawberry chunks, sliced macadamia nuts, honey, white chocolate sauce, and Ghirardelli caramel, which pretty much filled up the container I was using. The taste...er, tastes, are myriad, varied, and impossible to describe. The part of my brain that handles taste is probably forging new neural connections right now in order to handle the tsunami of new combinations of sensations flooding it. I hadn't noticed the honey the first time I was there, and it really adds a certain je ne sais quoi, an undefinable essence that permeates every bite and reminds me of the pleasant days back when I had a hive or two of my own, and how relaxing it was to be out there, working with the bees, watching them go about their little lives oblivious to me, inhaling the rich, intoxicating odor that comes only from the inside of a busy and active hive, the smell of little insects so full of life…ahhh…good times, good times. Up until the Varroa mites and the Colony Collapse Disorder killed ‘em.

But to keep this post from going somewhere very different from where it started, I've decided to do a little integral calculus, just for fun. A friend recently wondered aloud how much a certain large glass bottle filled with water weighed. Having had very few chances to use the calculus that I love so much all this semester (I've mostly only used algebra, which I despise), I decided to do a little volume integration and see if I couldn't figure it out. (hmmm…getting a little sleepy now after ingesting ~10 ounces of yogurt and toppings!)

I've never seen the bottle in question myself, so I only have some measurements and photos to go on. I've got that the outside diameter of the bottle is about 8 inches and its height is about 24 inches. This is corroborated by performing measurements on a (poor) picture of the bottle, which also shows its neck width to be about 2 inches. The glass is supposed to be about 3/8 of an inch thick, and it has a 5-inch deep V-shaped dent in the bottom for resisting internal pressure.

I played around with equations in Deadline (a nice little graphing program good for calculus) for a while until I found one that seems to fit pretty well. The structure of the bottle immediately reminded of a hyperbolic tangent function, and while it's probably impossible to get a perfect fit due to the perspective in the photos I used, the equation \((3/2)\tanh(x/4)+5/2\) seems to work quite well. You can see it graphed in the picture below (the red line is the graph Deadline put out, the green parts are my attempt to show what the bottle is approximately like):


Now, without delving too deeply into the theory of calculus, let me explain briefly what I will be doing. Imagine trying to find the volume of a cylinder. You know its volume is merely the area of its base (\(\pi r^2\)) times its height. Now instead of doing it in one step, suppose you divide the cylinder into a number of slices. It seems obvious that the volume of the cylinder is equal to the volume of all of those slices put together, and the volume of each slice can be found by using the volume equation for a cylinder using the new height of the slice. This is all well and good when considering a cylinder, but what if you have a cone? Any slices you make will not be cylinders, and thus cannot have the cylinder volume formula applied to them. After pondering this problem for a while, you may suddenly find yourself thinking “Aha! What if I make the slices infinitely thin? Then they will actually be little cylinders again, and I can find their volumes and sum them all up.”

On the face of it, this seems utterly preposterous, at least to me. Taking an infinite number of infinitely thin slices and adding them up to get a volume? Ridiculous! And yet the amazing thing is, it works. Isn't that incredible? Doesn't it just send shivers up and down your spine? To think that you, a mere mortal, can harness the concept of infinity for your own purposes! It's hard to convey the awe this fills me with whenever I ponder it. To me, doing these sorts of problems always gives me a feeling of flying, soaring high and away above the boring, mundane world of algebra and cutting right to the heart of a problem with eagle-like fleetness. Of course, to actually get an answer will usually require some algebra, which always feels like crash landing to me.

Anyway, the integral of integral calculus is simply a way to sum up an infinite number of slices of an object. Technically, what it adds up is the height of the function you are integrating at any given point. If we take the height of the function as the radius of a cylinder, we can square it and multiply by π to get the area of that particular slice. Adding all these areas up will give us the volume.

So! To begin...here is the equation we need to integrate:
\[V=\pi\int_{-10}^{18}\left(\frac{3}{2}\tanh\Big(\frac{x}{4}\Big)+\frac{5}{2}\right)^2dx\] (note how pretty \(\LaTeX\) makes everything!) Notice we have \(\pi\) multiplied by the sum of all the little slices from -10 to 18, which makes a total of 28 inches (the limits here are slightly strange, even for calculus, but it's for convenience with Deadline). The little dx at the end is an important part of calculus, but we don't need to bother with it now. Now, since this equation, while not difficult, would take quite a lot of algebra to solve, I'm just going to cheat and have Deadline do the integration for us. This gives us the result \(\pi\times81.96\approx257.5\) cubic inches. The bottle, however, is hollow. It has a thickness estimated at 3/8 of an inch. To a good approximation, the volume inside the bottle is simply the same function with 3/8 subtracted from it, like this:
\begin{align}V&=\pi\int_{-10}^{18}\left(\frac{3}{2}\tanh\Big(\frac{x}{4}\Big)+\frac{5}{2}-\frac{3}{8}\right)^2dx\\
&=\pi\int_{-10}^{18}\left(\frac{3}{2}\tanh\Big(\frac{x}{4}\Big)+\frac{17}{8}\right)^2dx\end{align} Although no more difficult in principle than the first integration, this is still a lot of writing to evaluate by hand, so again we call upon Deadline to get an answer of \(\pi\times71.46\approx224.5\) cubic inches. This is a reassuring answer, as subtracting it from the previous answer gives 33 cubic inches, which means that a little over 92% of the bottle's volume is actually available volume, not glass (i.e, the glass the bottle is made of occupies 33 cubic inches). However, we have not taken into account the V-shaped indentation in the bottom. Assuming that it spreads to the outside diameter minus \(2\times(3/8)=3/4\) inches, a little contemplation gives the equation: \[V=\pi\int_0^5(0.62x)^2dx\](the 0.62 comes from taking the inverse tangent of (29/8)/5 and converting to radians) At this point, things start getting somewhat complicated, so we're going to simply assume that there is a cone with this volume taken out of the bottom of the bottle. Obviously, this is not perfectly correct, and may lead to the final weight being slightly on the low side, but we weren't perfectly careful with the ends of the bottle either which ought to bring it back up slightly. The volume given by Deadline is \(\pi\times7.75\approx24.3\) cubic inches. Subtracting this from the volume found previously gives ≈ 200 cubic inches available for holding water.

So, let's recap: on some ever-so-slightly shaky assumptions we've found that the bottle has 33 cubic inches of glass and 200 cubic inches of holding space for water, assuming it's full right to the top. This translates to a carrying capacity of about 3.3 liters. Converting both values into cubic centimeters, we get  ≈ 540 cc's of glass and ≈ 3274 cc's of water. The density of water at 25 °C (room temperature, roughly) is 0.997 g/cm\(^3\). The density of glass, unfortunately, varies widely depending on the type, from less dense than aluminum to more dense than iron. According to Encyclopedia Britannica, 1971 edition, “common” glass has densities ranging from \(2.4-2.8\) g/cm\(^3\). Since this is tinted glass we're dealing with, and I have no idea how common it is, and usually less “common” glasses tend to be denser, I'm going to go with the heavier side and use 2.8. Multiplying the volumes times the densities gives the masses, which turn out to be ≈ 3264 g of water and 1512 g of glass (interestingly, this implies the glass makes up just a bit less than 1/3 of the total mass of the full bottle). Multiplying the masses (in kg) of the water and glass times the acceleration due to gravity (9.8 m/s\(^2\)) at the Earth's surface gives the weight, in Newtons: ≈ 32 N for the water, and ≈ 15 N for the glass. Together this gives a weight of 47 Newtons, which is about 10 and a half pounds. This works out to about 68% of the weight being water and 32% being glass, in agreement with our earlier estimate.

Error analysis: possible error: quite large. I've never held or even seen one of these bottle in person, so I'm relying on estimated measurements by other people. Function fitting was rudimentary and qualitative: if I wanted to be really through, I could have done a least-squares-fit regression analysis to determine the ‘best’ fit to the bottle (I don't actually know how to do that, but it never seemed that difficult in theory). Of course, a more thorough analysis of the complicated bottom of the bottle could be done; this reminds me of the “just assume everything is a frictionless, homogeneous sphere in vacuum” joke in physics. Personally, I think 3/8 of an inch is a bit thick for the glass; I hazard a guess that 1/4 would be closer to the mark, which would raise the weight a bit by having more volume for water, but again I've never handled the glass to see about this, and it probably varies throughout the bottle, a factor I didn't take into account. The glass may be denser than the value I assumed; it looks like old glass, which could be of (significantly) higher density than the value I used.

I suppose, in the end, the slightly depressing thing is that for all my mathematical tricks the quickest and easiest way remains simply to weigh the thing. If such a thing is ever done, I would appreciate being informed of just how off I was. Oh, and if you spot any errors in my math, please let me know!

Saturday, June 5, 2010

Burning questions of a Saturday morning.

So there I was lying in bed this morning, still half-asleep, when I got to pondering the fact that I, like the atoms that compose me, am made up of 99.99% empty space. I then idly contemplated the fact that most of this mass was in the nuclei of my atoms, at which point I was seized by a burning desire to find out how much all the electrons in all the atoms of my body put together weighed.


I know that last I checked, I had a mass of approximately 60 kg (my weight is left as an exercise for the reader), and a little searching on the 'net produced a table with the percent-by-mass composition of an average person. Starting with the first entry in the list, I have around \(61.35\text{%}\cdot 60\ \text{kg} = 36.81\ \text{kg}\) of oxygen in me. That's 36,810 grams of oxygen. A mole of oxygen being 16.00 grams, that's almost exactly 2,300 moles of oxygen in me.

(A mole, in chemistry, is simply a very large number \(-\ 6.022\times10^{23}\), to be exact. The conversion between grams and moles is pretty easy; if you have an amount of a substance equal in grams to the atomic weight of one atom (or molecule) of that substance, you have one mole of that substance, i.e., \(6.022\times10^{23}\) atoms (or molecules) of the substance. Since the atomic weight of oxygen is 16.00 atomic mass units, one mole of oxygen is 16.00 grams of oxygen. One more of oxygen at \(0^\circ\)C and normal atmospheric pressure would occupy about 22.4 liters, or just under 6 gallons.)

Now, each oxygen atom comes with 8 electrons in tow, \(8\) electrons \(\times\) \(2,300\) moles \(\times\) \(6.022\times10^{23}=1.11\times10^{28}\) electrons.

That...is a very large number. (11.1 billion billion billion).

And that's just the first element on the list! (Although, by virtue of its nature, it is likely to provide the largest number of electrons.) Next up is carbon, which, at 22.83%, comprises 13.70 kg of me. Dividing by 12.00 grams per mole, and multiplying by 6 electrons to each carbon atom, we arrive at \(3.09\times10^{27}\) electrons from carbon, a factor of 10 less than from oxygen (not surprisingly).

Since the procedure is relatively boring, and quite simple, I will spare you further talk and simply list the amounts in the table below:


oxygen        36.81 kg  \(1.11\times10^{28}\) electrons
carbon        13.70 kg  \(3.09\times10^{27}\) electrons
hydrogen      6.00 kg   \(3.57\times10^{27}\) electrons
nitrogen      1.54 kg   \(4.64\times10^{26}\) electrons
calcium       0.86 kg   \(2.58\times10^{26}\) electrons
phosphorus    670 g     \(1.94\times10^{26}\) electrons
potassium     120 g     \(3.51\times10^{25}\) electrons
sulfur        120 g     \(3.61\times10^{25}\) electrons
sodium        84 g      \(2.42\times10^{25}\) electrons
chlorine      84 g      \(2.43\times10^{25}\) electrons
magnesium     18 g      \(5.35\times10^{24}\) electrons
iron          6.0 g     \(1.68\times10^{24}\) electrons
fluorine      2.4 g     \(6.85\times10^{23}\) electrons
zinc          1.8 g     \(5.00\times10^{23}\) electrons
silicon       0.60 g    \(1.80\times10^{23}\) electrons
rubidium      0.60 g    \(1.56\times10^{23}\) electrons
strontium     0.30 g    \(7.84\times10^{22}\) electrons
bromine       0.24 g    \(6.33\times10^{22}\) electrons
lead          0.12 g    \(2.86\times10^{22}\) electrons
copper        0.06 g    \(1.65\times10^{22}\) electrons
aluminum      60 mg     \(1.74\times10^{22}\) electrons
cadmium       60 mg     \(1.54\times10^{22}\) electrons
cerium        60 mg     \(1.50\times10^{22}\) electrons
barium        18 mg     \(4.42\times10^{21}\) electrons
iodine        18 mg     \(4.53\times10^{21}\) electrons
tin           18 mg     \(4.57\times10^{21}\) electrons
titanium      18 mg     \(4.98\times10^{21}\) electrons
boron         18 mg     \(5.01\times10^{21}\) electrons
nickel        12 mg     \(3.45\times10^{21}\) electrons
selenium      12 mg     \(3.11\times10^{21}\) electrons
chromium      12 mg     \(3.34\times10^{21}\) electrons
manganese     12 mg     \(3.29\times10^{21}\) electrons
arsenic       6.0 mg    \(1.59\times10^{21}\) electrons
lithium       6.0 mg    \(1.56\times10^{21}\) electrons
cesium        5.4 mg    \(1.35\times10^{21}\) electrons
mercury       5.4 mg    \(1.30\times10^{21}\) electrons
germanium     4.2 mg    \(1.11\times10^{21}\) electrons
molybdenum    4.2 mg    \(1.10\times10^{21}\) electrons
cobalt        2.4 mg    \(6.62\times10^{20}\) electrons
antimony      1.8 mg    \(4.54\times10^{20}\) electrons
silver        1.8 mg    \(4.72\times10^{20}\) electrons
niobium       1.2 mg    \(3.19\times10^{20}\) electrons
zirconium     0.60 mg   \(1.58\times10^{20}\) electrons
lanthanum     0.60 mg   \(1.48\times10^{20}\) electrons
gallium       0.60 mg   \(1.61\times10^{20}\) electrons
tellurium     0.60 mg   \(1.47\times10^{20}\) electrons
yttrium       0.54 mg   \(1.42\times10^{20}\) electrons
bismuth       0.42 mg   \(1.00\times10^{20}\) electrons
thallium      0.42 mg   \(1.00\times10^{20}\) electrons
indium        0.36 mg   \(9.25\times10^{19}\) electrons
gold          0.18 mg   \(4.35\times10^{19}\) electrons
scandium      0.18 mg   \(5.06\times10^{19}\) electrons
tantalum      0.18 mg   \(4.37\times10^{19}\) electrons
vanadium      0.12 mg   \(3.26\times10^{19}\) electrons
thorium       0.060 mg  \(1.40\times10^{19}\) electrons
uranium       60 μg     \(1.40\times10^{19}\) electrons
samarium      42 μg     \(1.04\times10^{19}\) electrons
beryllium     30 μg     \(8.02\times10^{18}\) electrons
tungsten      18 μg     \(4.36\times10^{18}\) electrons


(if you're wondering about the units, conveniently, 0.06 g = 60 mg and 0.06 mg = 60 μg)

If you add all those electrons up, you come up with a total of \(1.88\times10^{28}\) electrons. That's a lot of electrons -- 18.8 billion billion billion, to be exact. But how much mass do they have? And how much do they weigh?

Finding the mass is easy. The mass of an electron is \(9.11\times10^{-31}\) kg so \(1.88\times10^{28}\) of them together have a mass of 17.1 grams, which has a weight of approximately 1/25 of a pound.

Wow. All the electrons in my body make up a measly 0.0000029% of my mass. Everything else is concentrated in the nuclei of my atoms. Wild, huh?

Saturday, May 29, 2010

Climbing Mt. Impossible-to-Breathe

Well, today was a rather different day, even by the standards of my not-so-average life. After a terrible time falling asleep last night, I got up on five hours of sleep to leave Hilo as the sun was just assaying to climb into the eastern sky to ascend Mauna Kea with several other volunteers for the purpose of building rock curbs along one of the paths to the summit to mark it as the one visitors should use. While in the process of checking my email over breakfast during my usual morning wake-up routine, I discovered a message from the school informing me that I had financial aid updates. Not expecting anything of this nature, I followed this cryptic message and found out that I had just been awarded the Daniel K. Inouye Scholarship in Astronomy, of which there is one award per year made to an undergraduate Astronomy major in their senior year, amount equal to one-half tuition for one year.

Needless to say, I was floored.

I almost couldn't believe it at first, it was so out-of-the-blue. It's not a scholarship you apply for, so I had no prior anticipation of it coming. When I finally managed to quench my tears of joy, I remembered that I still had to be at MKSS ready to drive a bunch of volunteers up to Mauna Kea by 6:45 AM.

The ride up was fascinating. I've never driven the Saddle in the morning before, when it has not yet been clouded in. I saw Hualālai, the volcano on the west side of Hawai`i, in its entirety for the first time (I've seen its peak above the clouds [it's over 8,000 feet high], and its base under them [once], but never from base to peak before). And on the drive up Mauna Kea we saw a gaggle of some 10-20 nēnē! Nēnē, the state bird of Hawaii, are not exactly a common sight, so it was quite a thrill to see so many at once in a group.

I'd gotten a somewhat vague description of what we would be doing, “building rock walls at the summit”, which I jumped at because it looked like it afforded a chance to visit the actual peak for the first time. What it turned out to be is that the Mauna Kea rangers have been building little “curbs” out of rocks along the sides of a trail up to the summit, in hopes of keeping people on the trail. It being slow going with only a few people putting in time when they could, they decided they could use a little volunteer help. After a delicious breakfast at Hale Pōhaku, we headed up with two of the rangers and began moving rocks, by pick-up, wheelbarrow, bucket, and hand.

According to the thermometer, it was 30 degrees Fahrenheit on the summit at the time we started driving up, and with the wind chill it probably dropped another 15, at least. Man, that wind was cold. And desiccating. It's amazing how fast it leaches the water right out of you up there.

Moving rocks around at that altitude is really kind of strange. For one thing, all the rocks, even two that come from right next to each other, are different. You could pick up two similarly-sized rocks and have one so light it makes you wonder if you're holding a good Styrofoam replica, while the other is difficult to lift because of its weight. The range of densities is astonishing.  The range of colors is interesting as well, usually gray or dull red (from the iron content), but sometimes dark black, or even with shiny embedded minerals. Exercise, in the low oxygen conditions, is a bit more difficult, necessitating frequent breaks to catch your wind and rehydrate. And the cold! The wind blew incessantly, rapidly numbing all extremities and drying my eyes out so much it took almost a half-hour of sitting in the truck on the way back to HP at lunch time for them to rehydrate.

We really didn't work very long, about two hours, but we got a good long stretch of the path curbed on both sides. When we finished moving all the rocks we'd started with, we had some free time so we headed on up to the summit. It was at this point that I realized I'd brought my camera, but left my memory card at home in my computer, so unfortunately, no pictures today.

The walk to the summit is misleadingly difficult. From the start of the trail, by the road, it doesn't look too bad—until you're making your way up multiple switchbacks across a steep hillside composed of slippery cinder, fighting to draw each ragged breath containing only 60% of the oxygen content it would at sea level, your muscles vociferously complaining about the hypoxic conditions. But the view from the top is worth it, in my opinion. It was still early enough in the day that clouds hadn't covered the entire north-east coast of Hawaiʻi, so I was able to see the shoreline in that direction. I was also, for the first time, able to see over the limb of Mauna Loa all the way to the south-east shoreline. I can now say I have been at an altitude of 13,796 feet on my own, probably the highest I've ever been (besides airplane trips, of course).

The structure of Puʻu Wēkiu is that it is the rim of an old crater, with the summit being the highest point on the rim. The path we were working on comes at it from one side, so I took the path down around the other side on the way back, which provided a good brisk walk and some excellent views.

After a hearty lunch of grilled cheese sandwiches (yum!), it was back down to Hilo, finally getting back at 3 o’clock. Once again, I apologize for the lack of pictures; should I get the chance again (and it seems likely that they'll be having volunteers up to help again sometime soon), I will endeavor to make up with it with some shots from the tallest mountain on earth*.

*measured from the sea floor.

A hui hou!